CNC Milling with Shopbot

Machine: Shopbot
Software: Shopbot 3, VCarve Pro
We have a Shopbot milling machine at the lab. For this tutorial, we prepared an example cut file within VCarve Pro.
Here are the Milling Steps:
General cleaning around the machine
- Check around the machine for clear movement in all three axis. The paths of movement should be free of obstructions.- Clean the bed of the CNC milling machine, use a vacuum cleaner if necessary.
- Check for protruding screw marks on the sacrificial layer. If found, eliminate them with sand paper.
Check and place your material
- Measure the thickness of your material at several locations (we are going to use the maximum value).- Measure the length and width of the sheet.
- Remove any foreign objects/screws from the material. Especially metal objects are dangerous. They create high resistance for the milling bit which rotates at 18000 rpm. And if metal shavings enter the ventilation and reach the dust collection bags, they can cause fires.
- Place your material on the sacrificial layer.
Turn on the CNC milling machine
- Rotate the knob clockwise.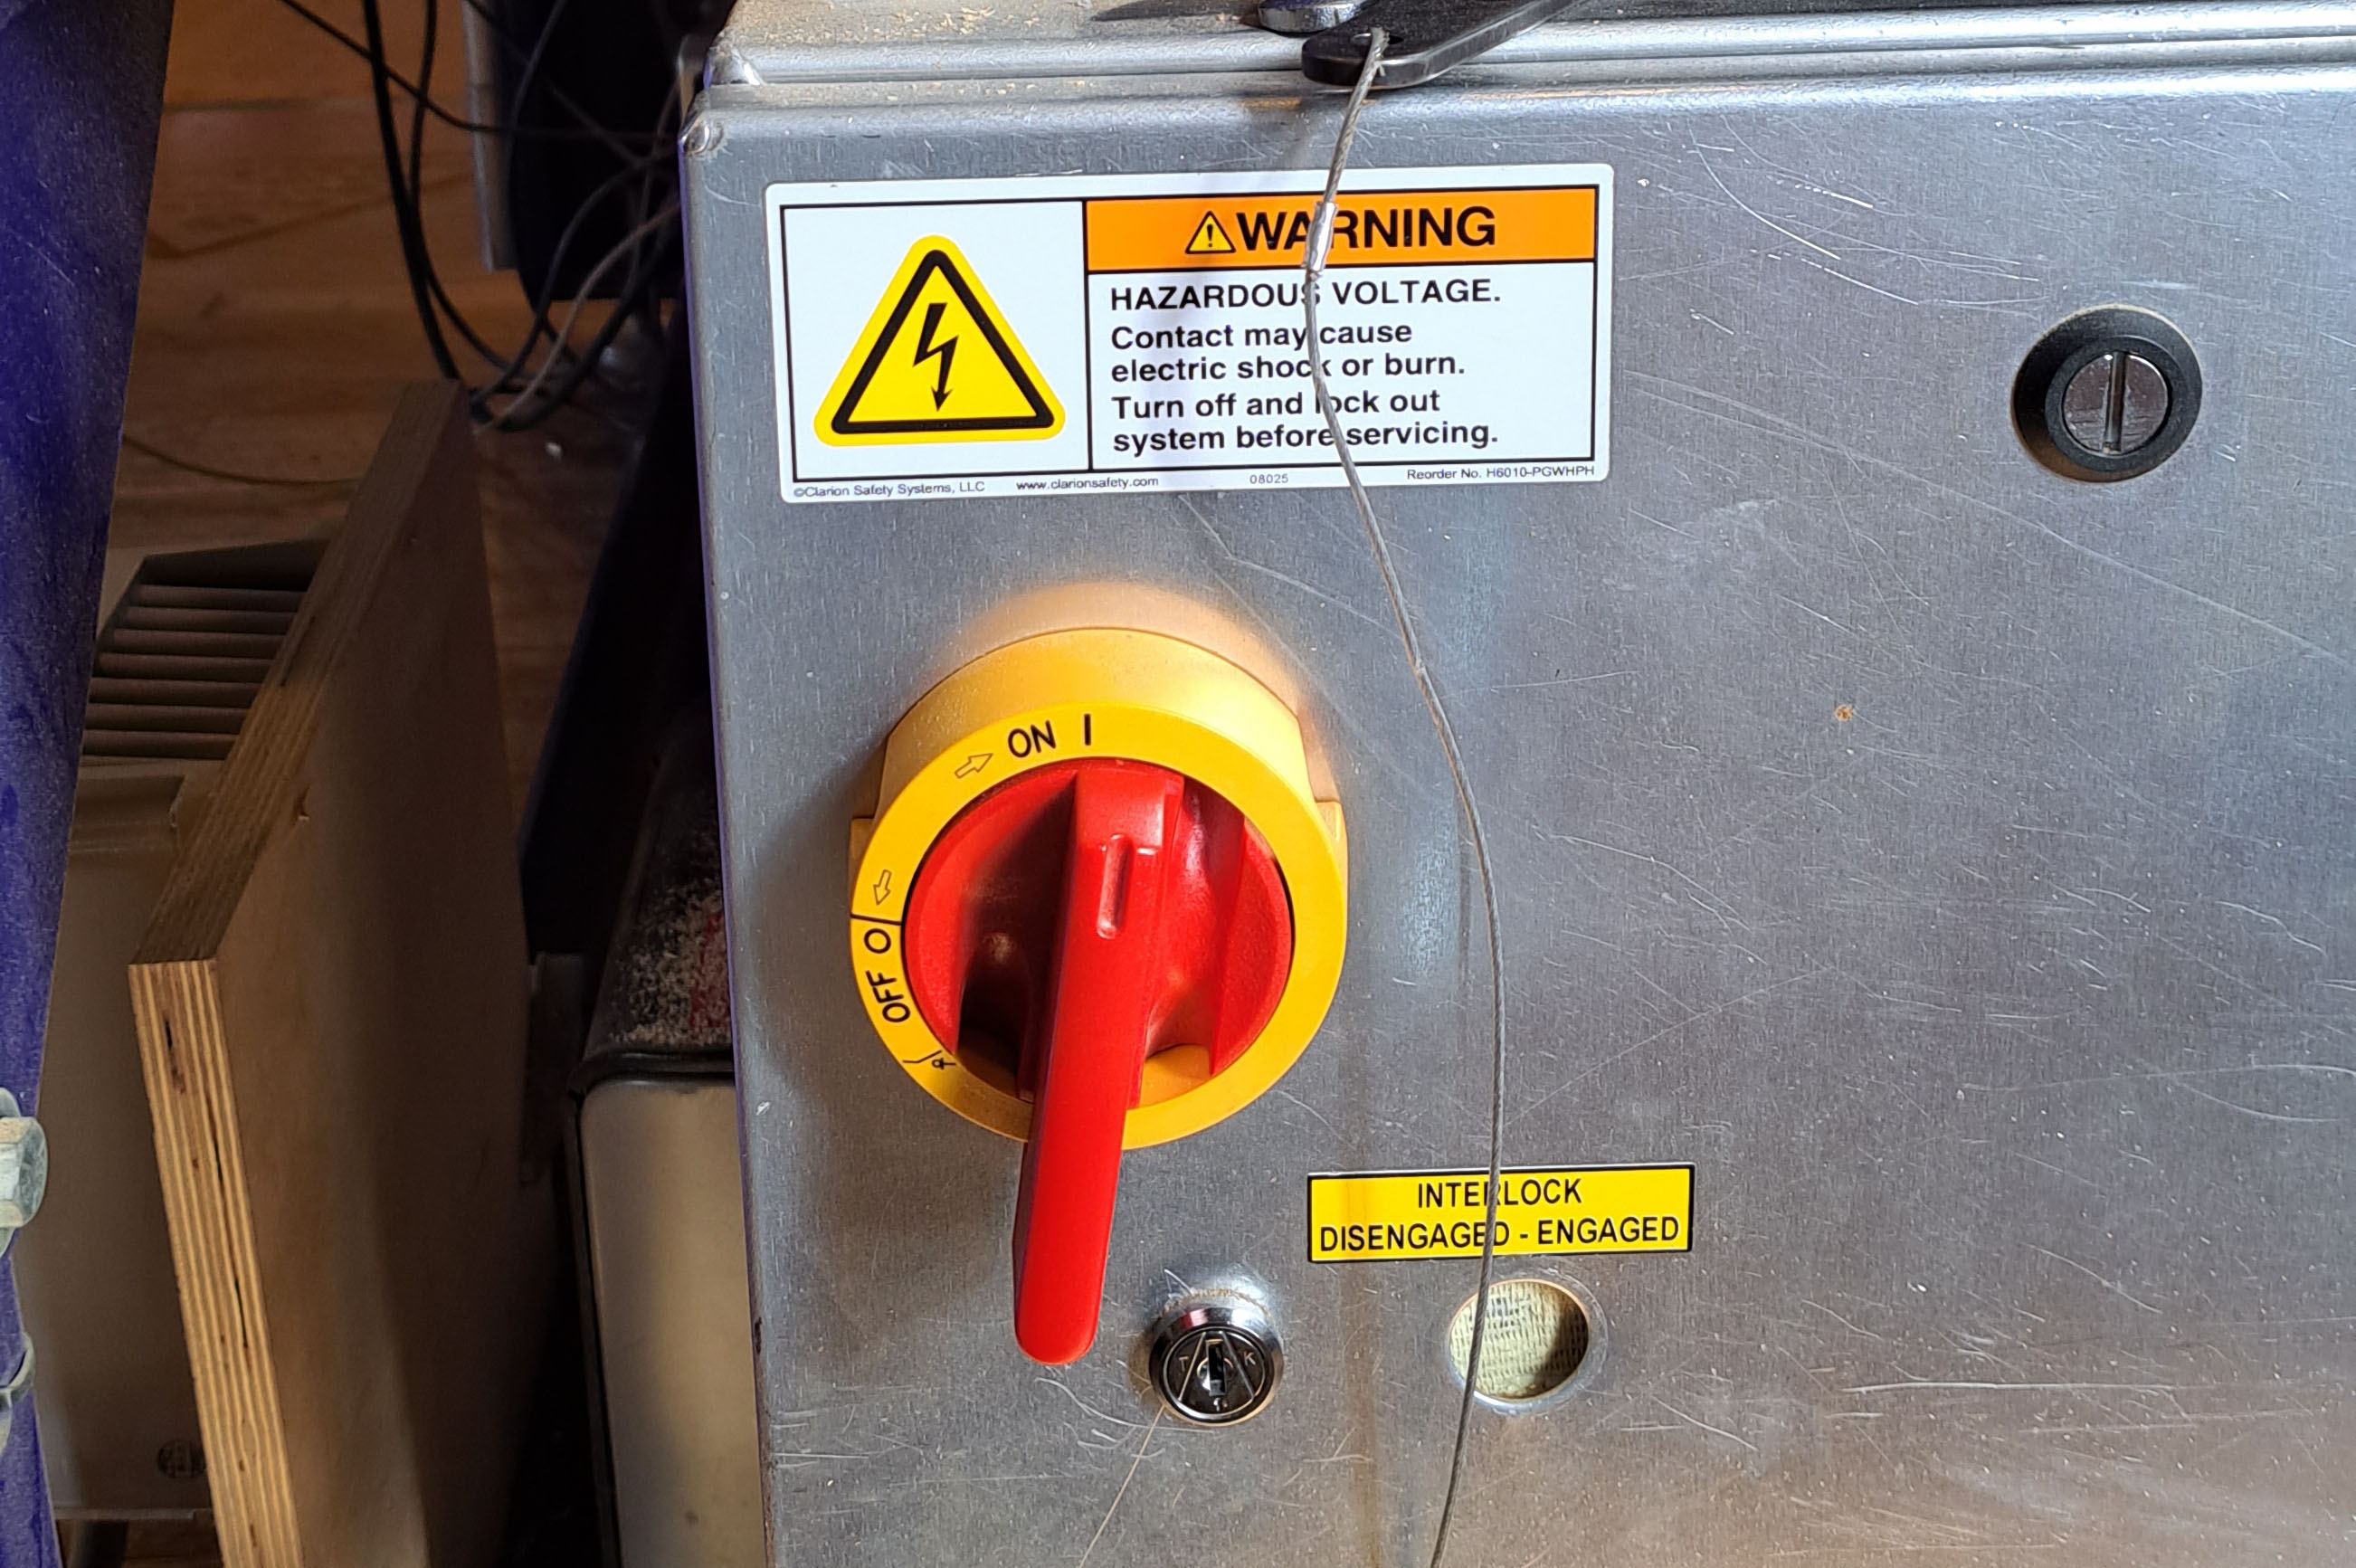
Open Shopbot 3 software
- In command box, type K to open the keypad.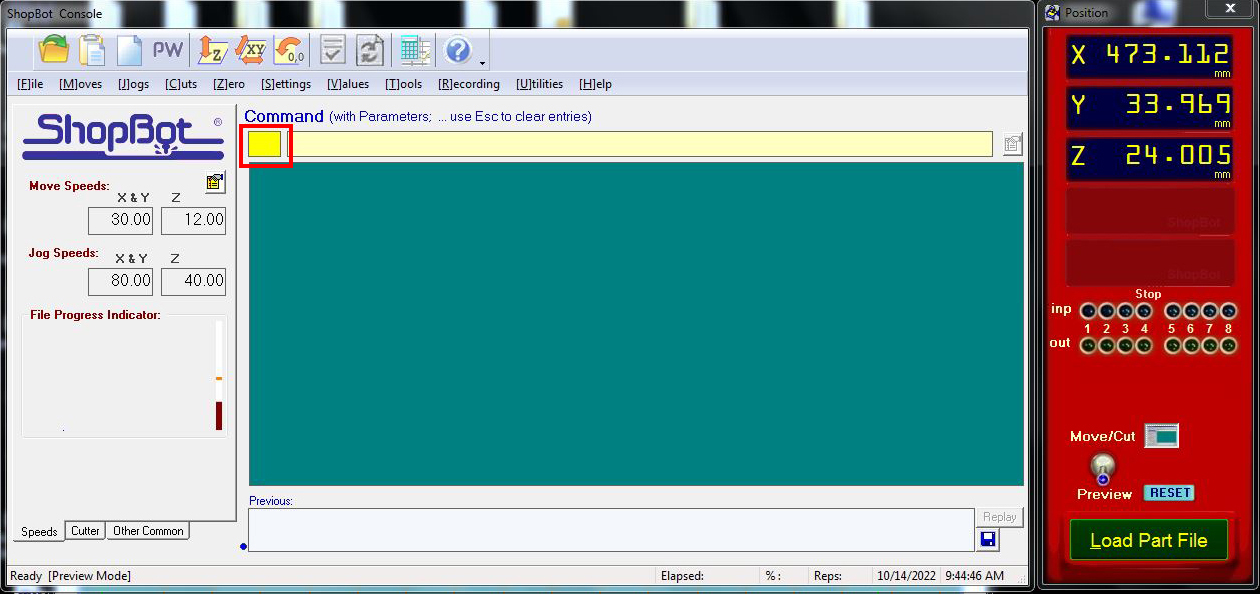
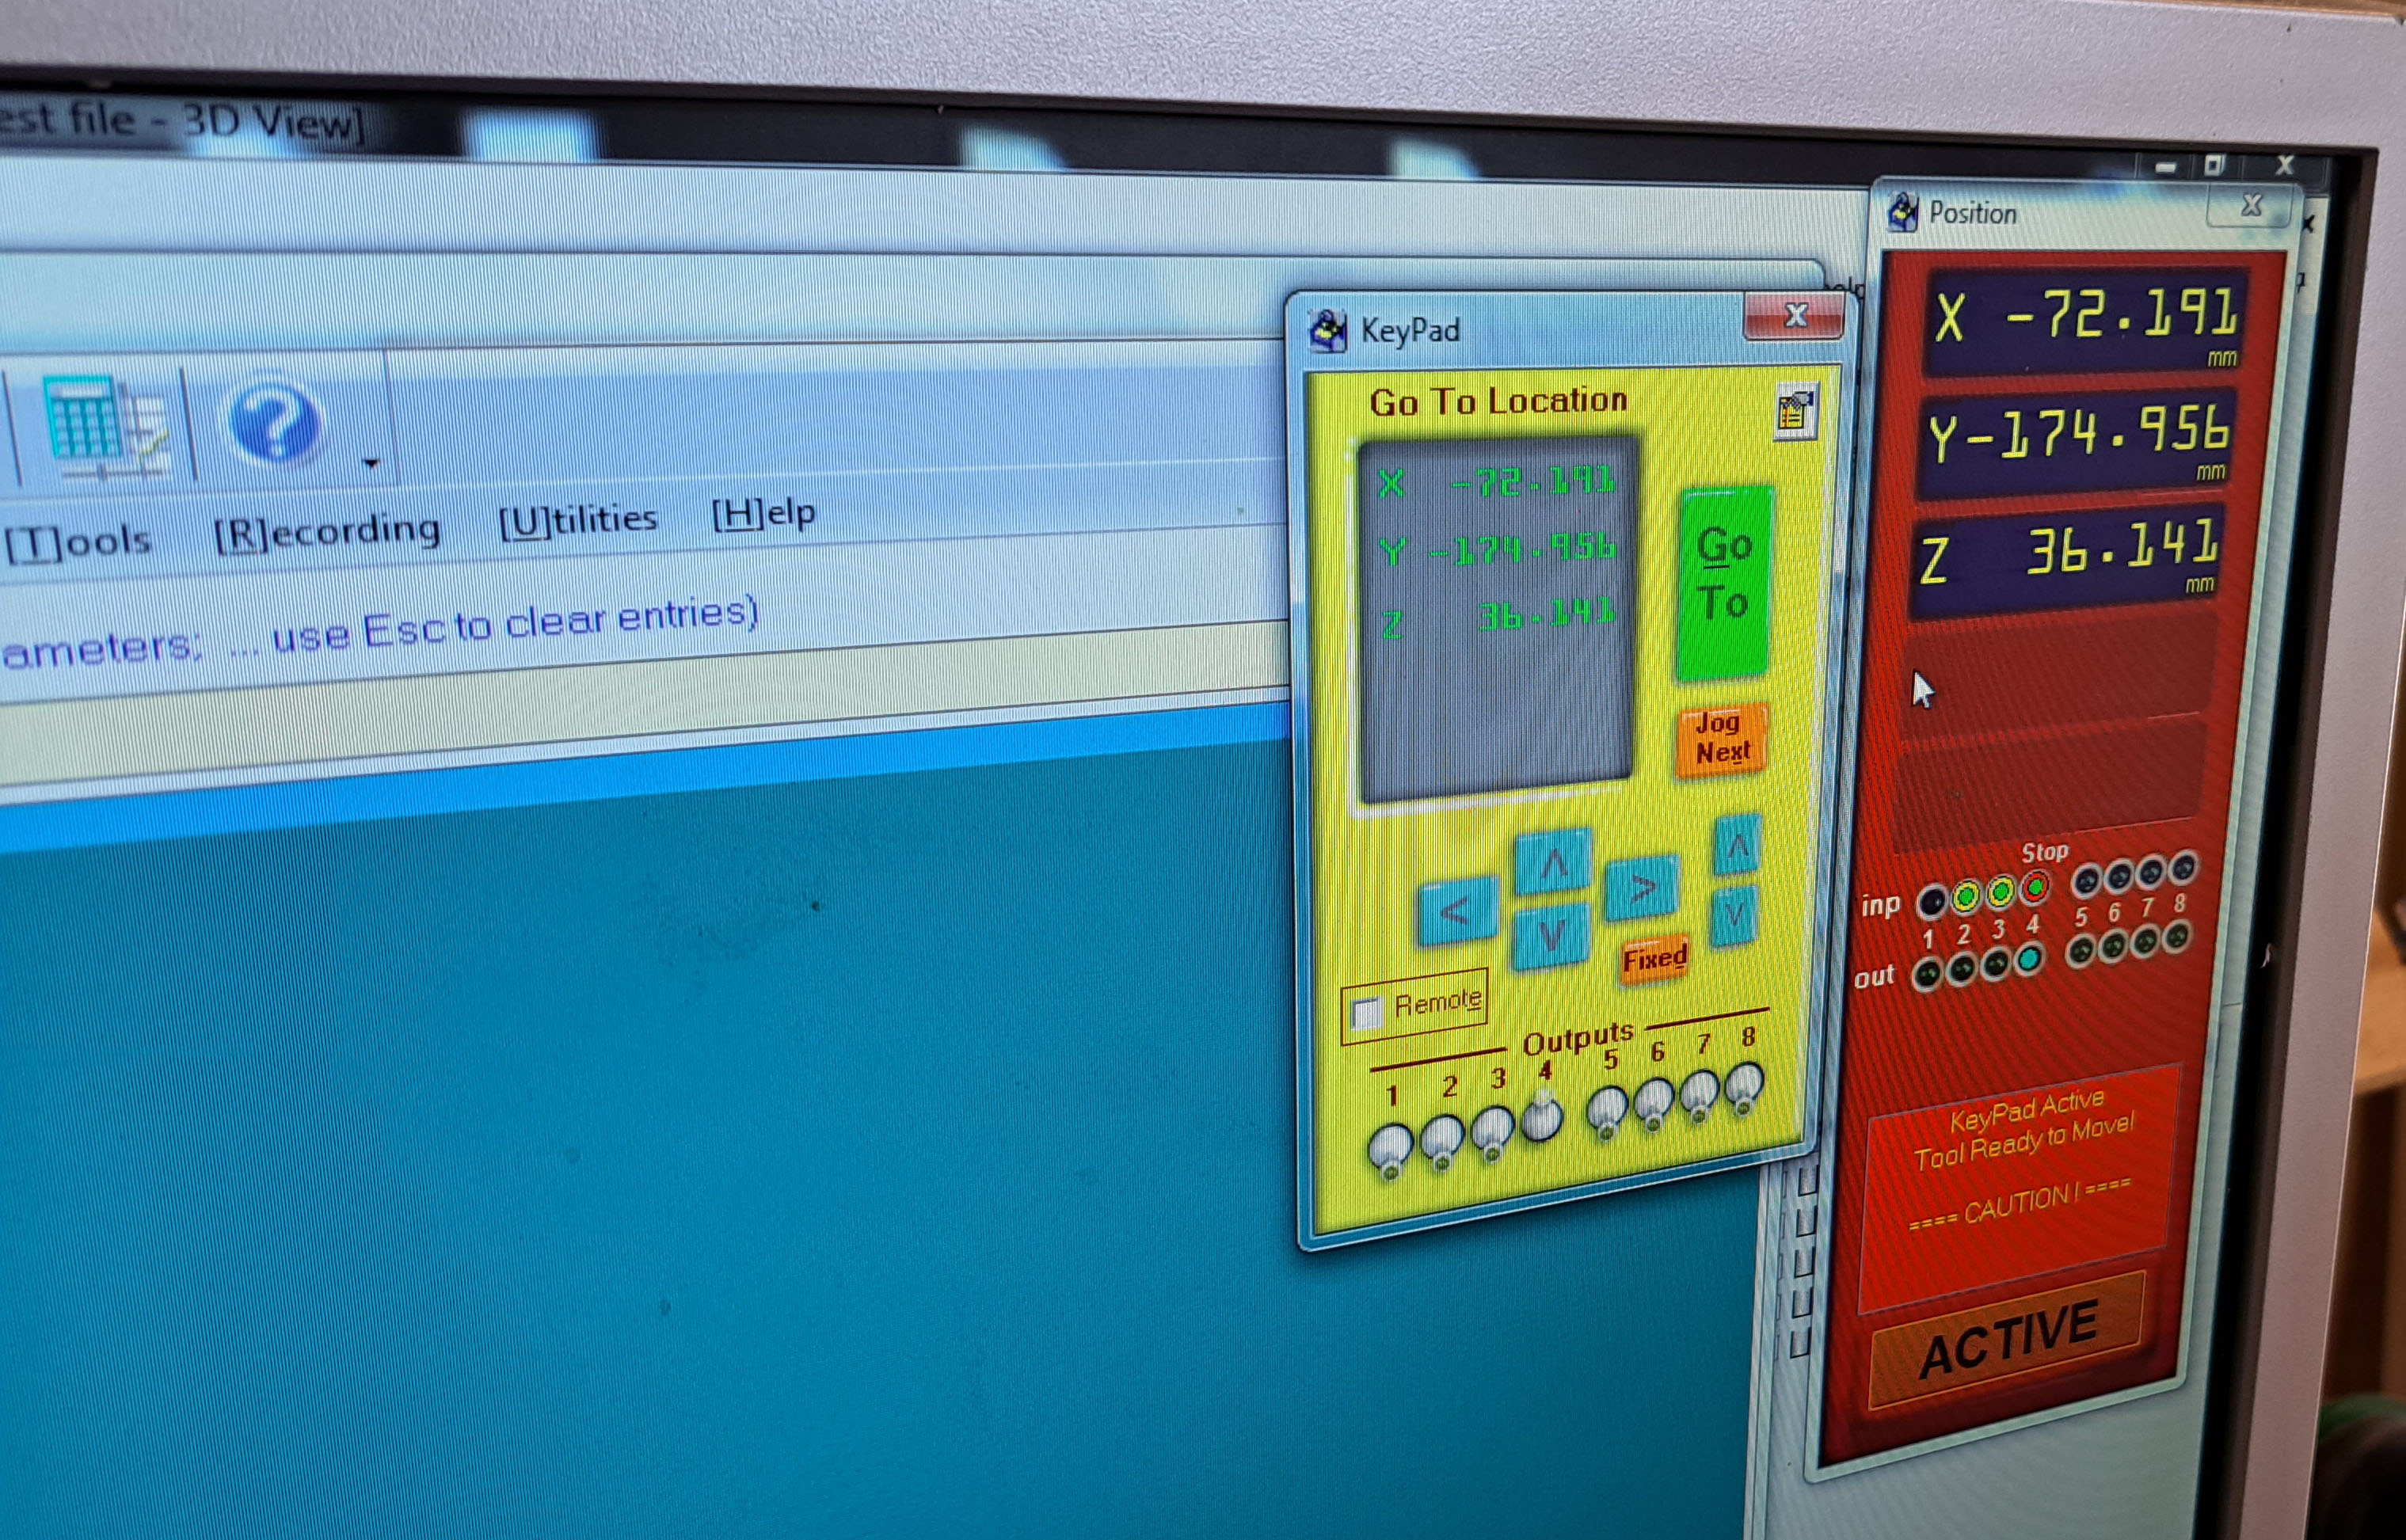
- Bring the milling head towards you to change the collet and milling bit:
UP, DOWN, LEFT and RIGHT keys: control the movement in X- and Y-axis.
PAGE UP and PAGE DOWN keys: control the movement in Z-axis.
Ctrl + control keys: moves the milling head faster.
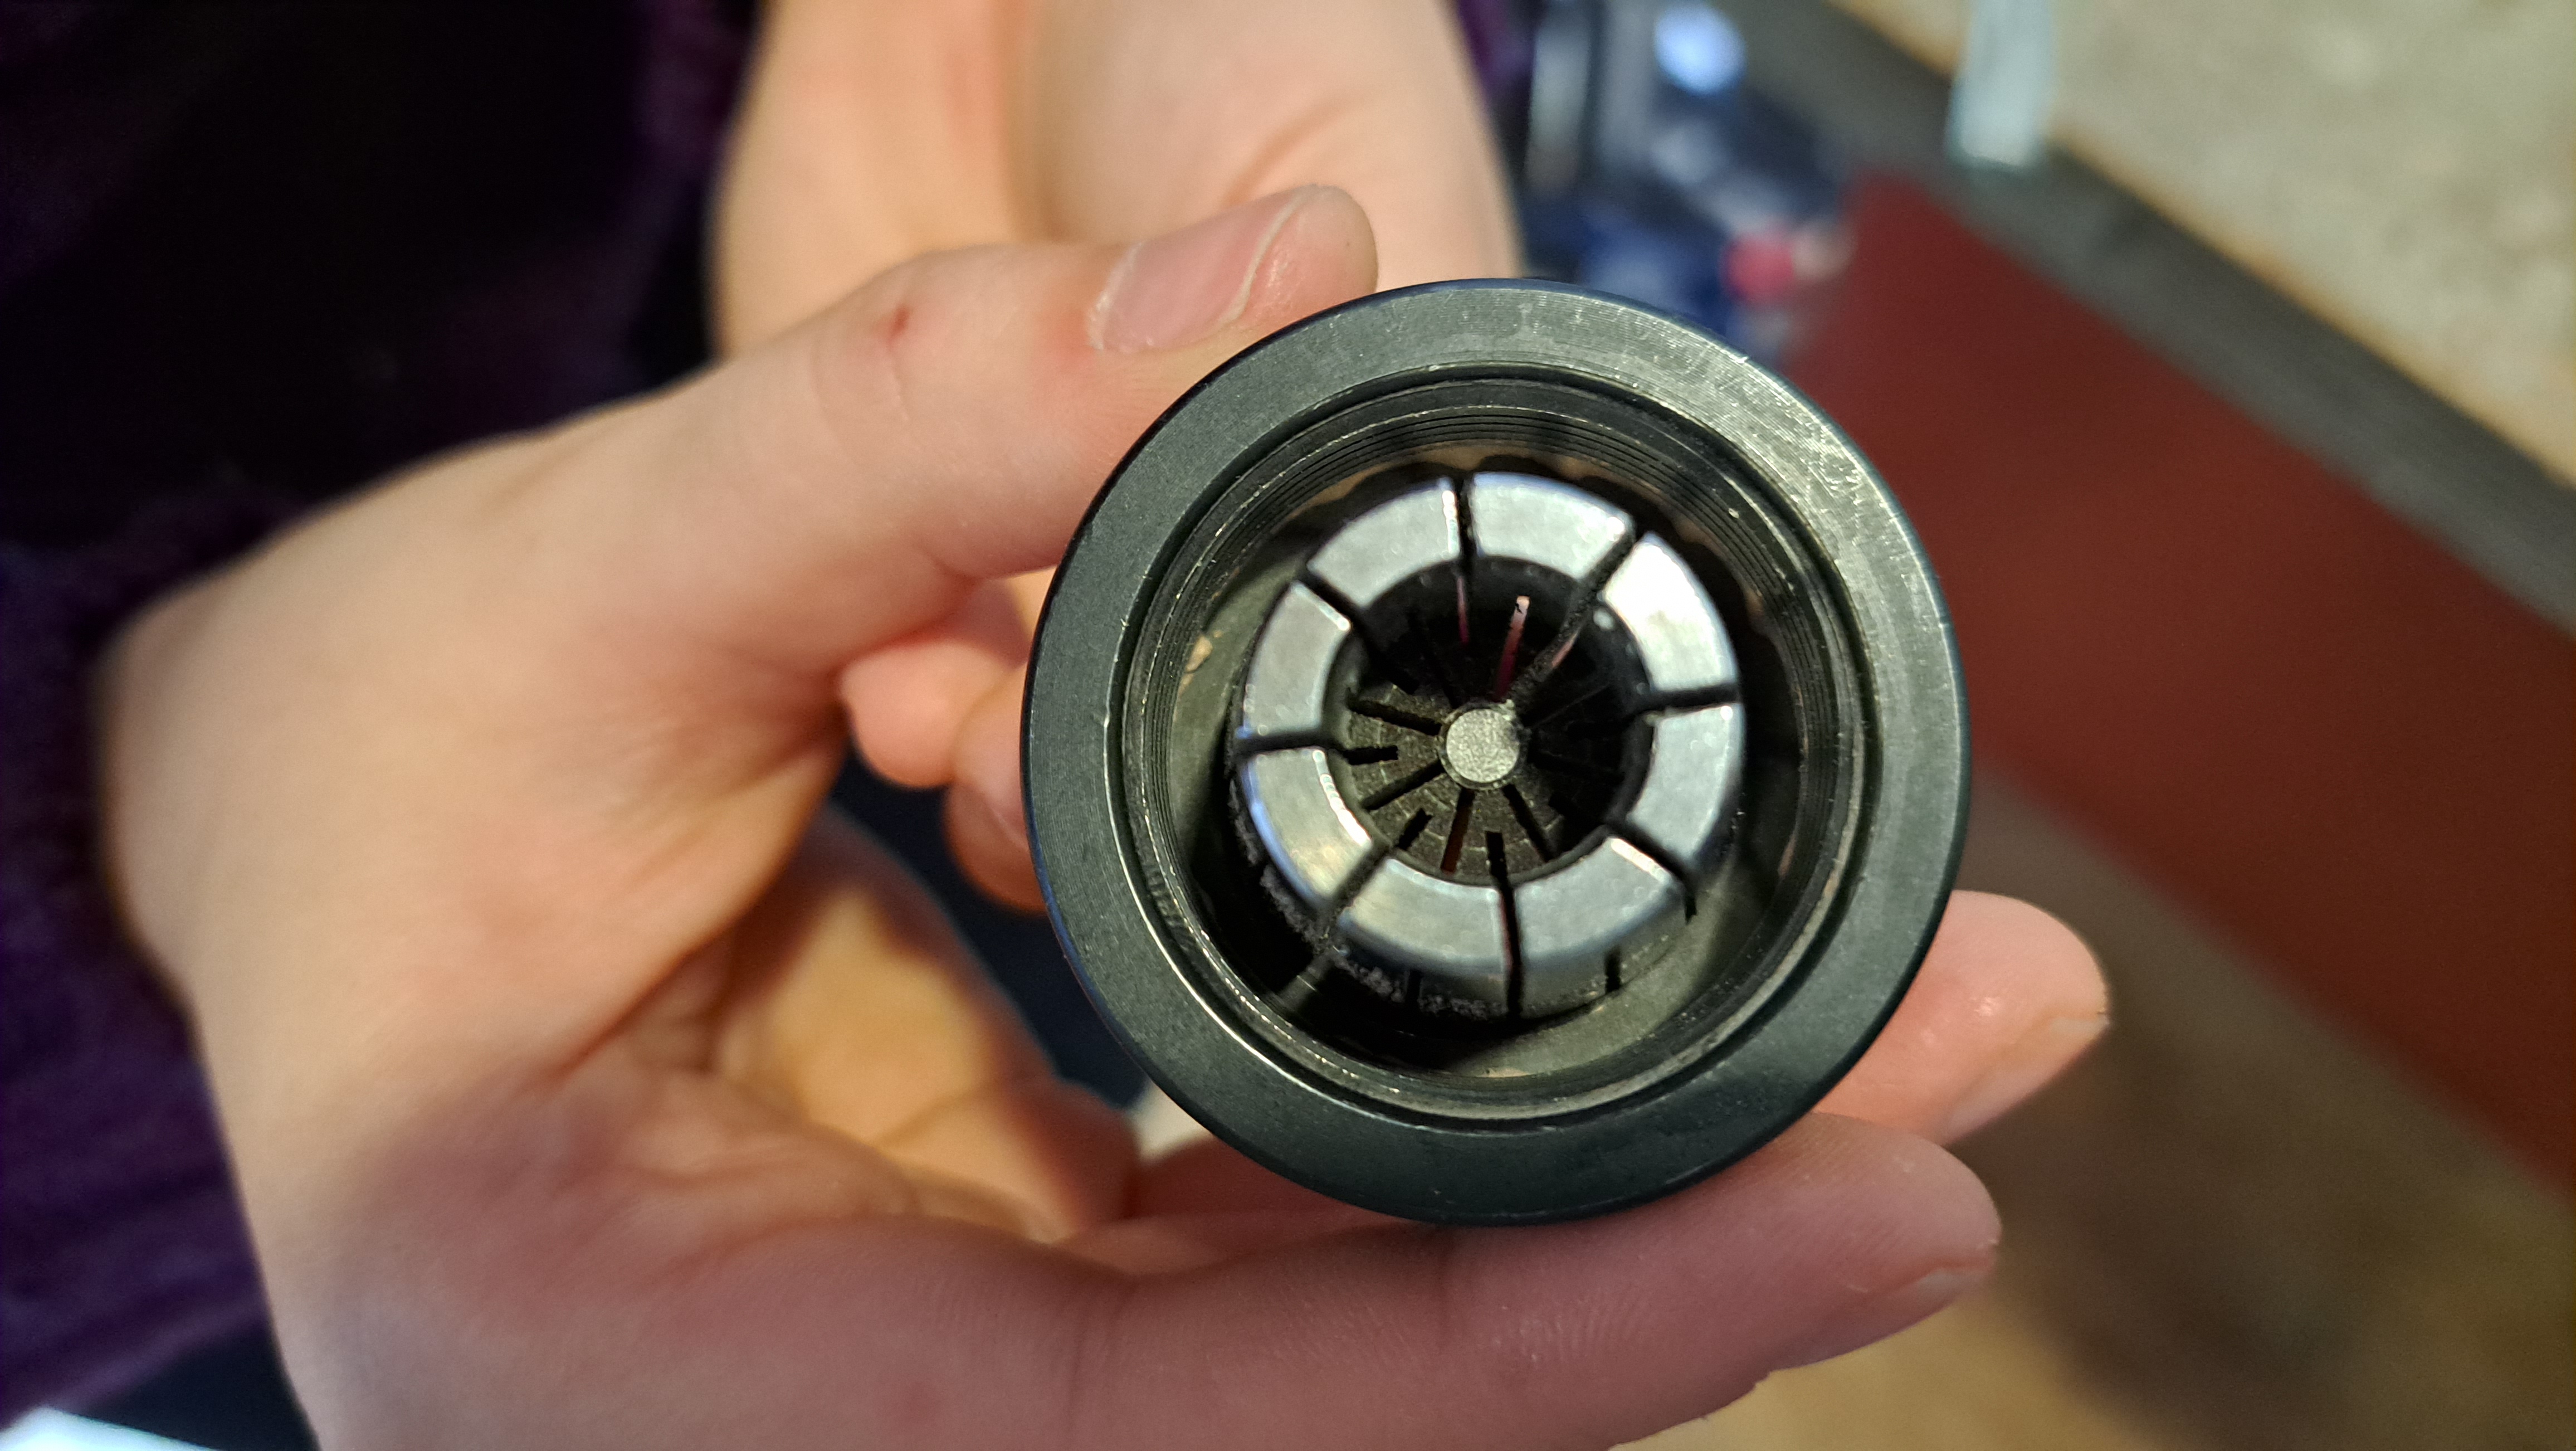
Change the collet and milling bit
- Put the skirt down by loosening the butterfly nut at the back.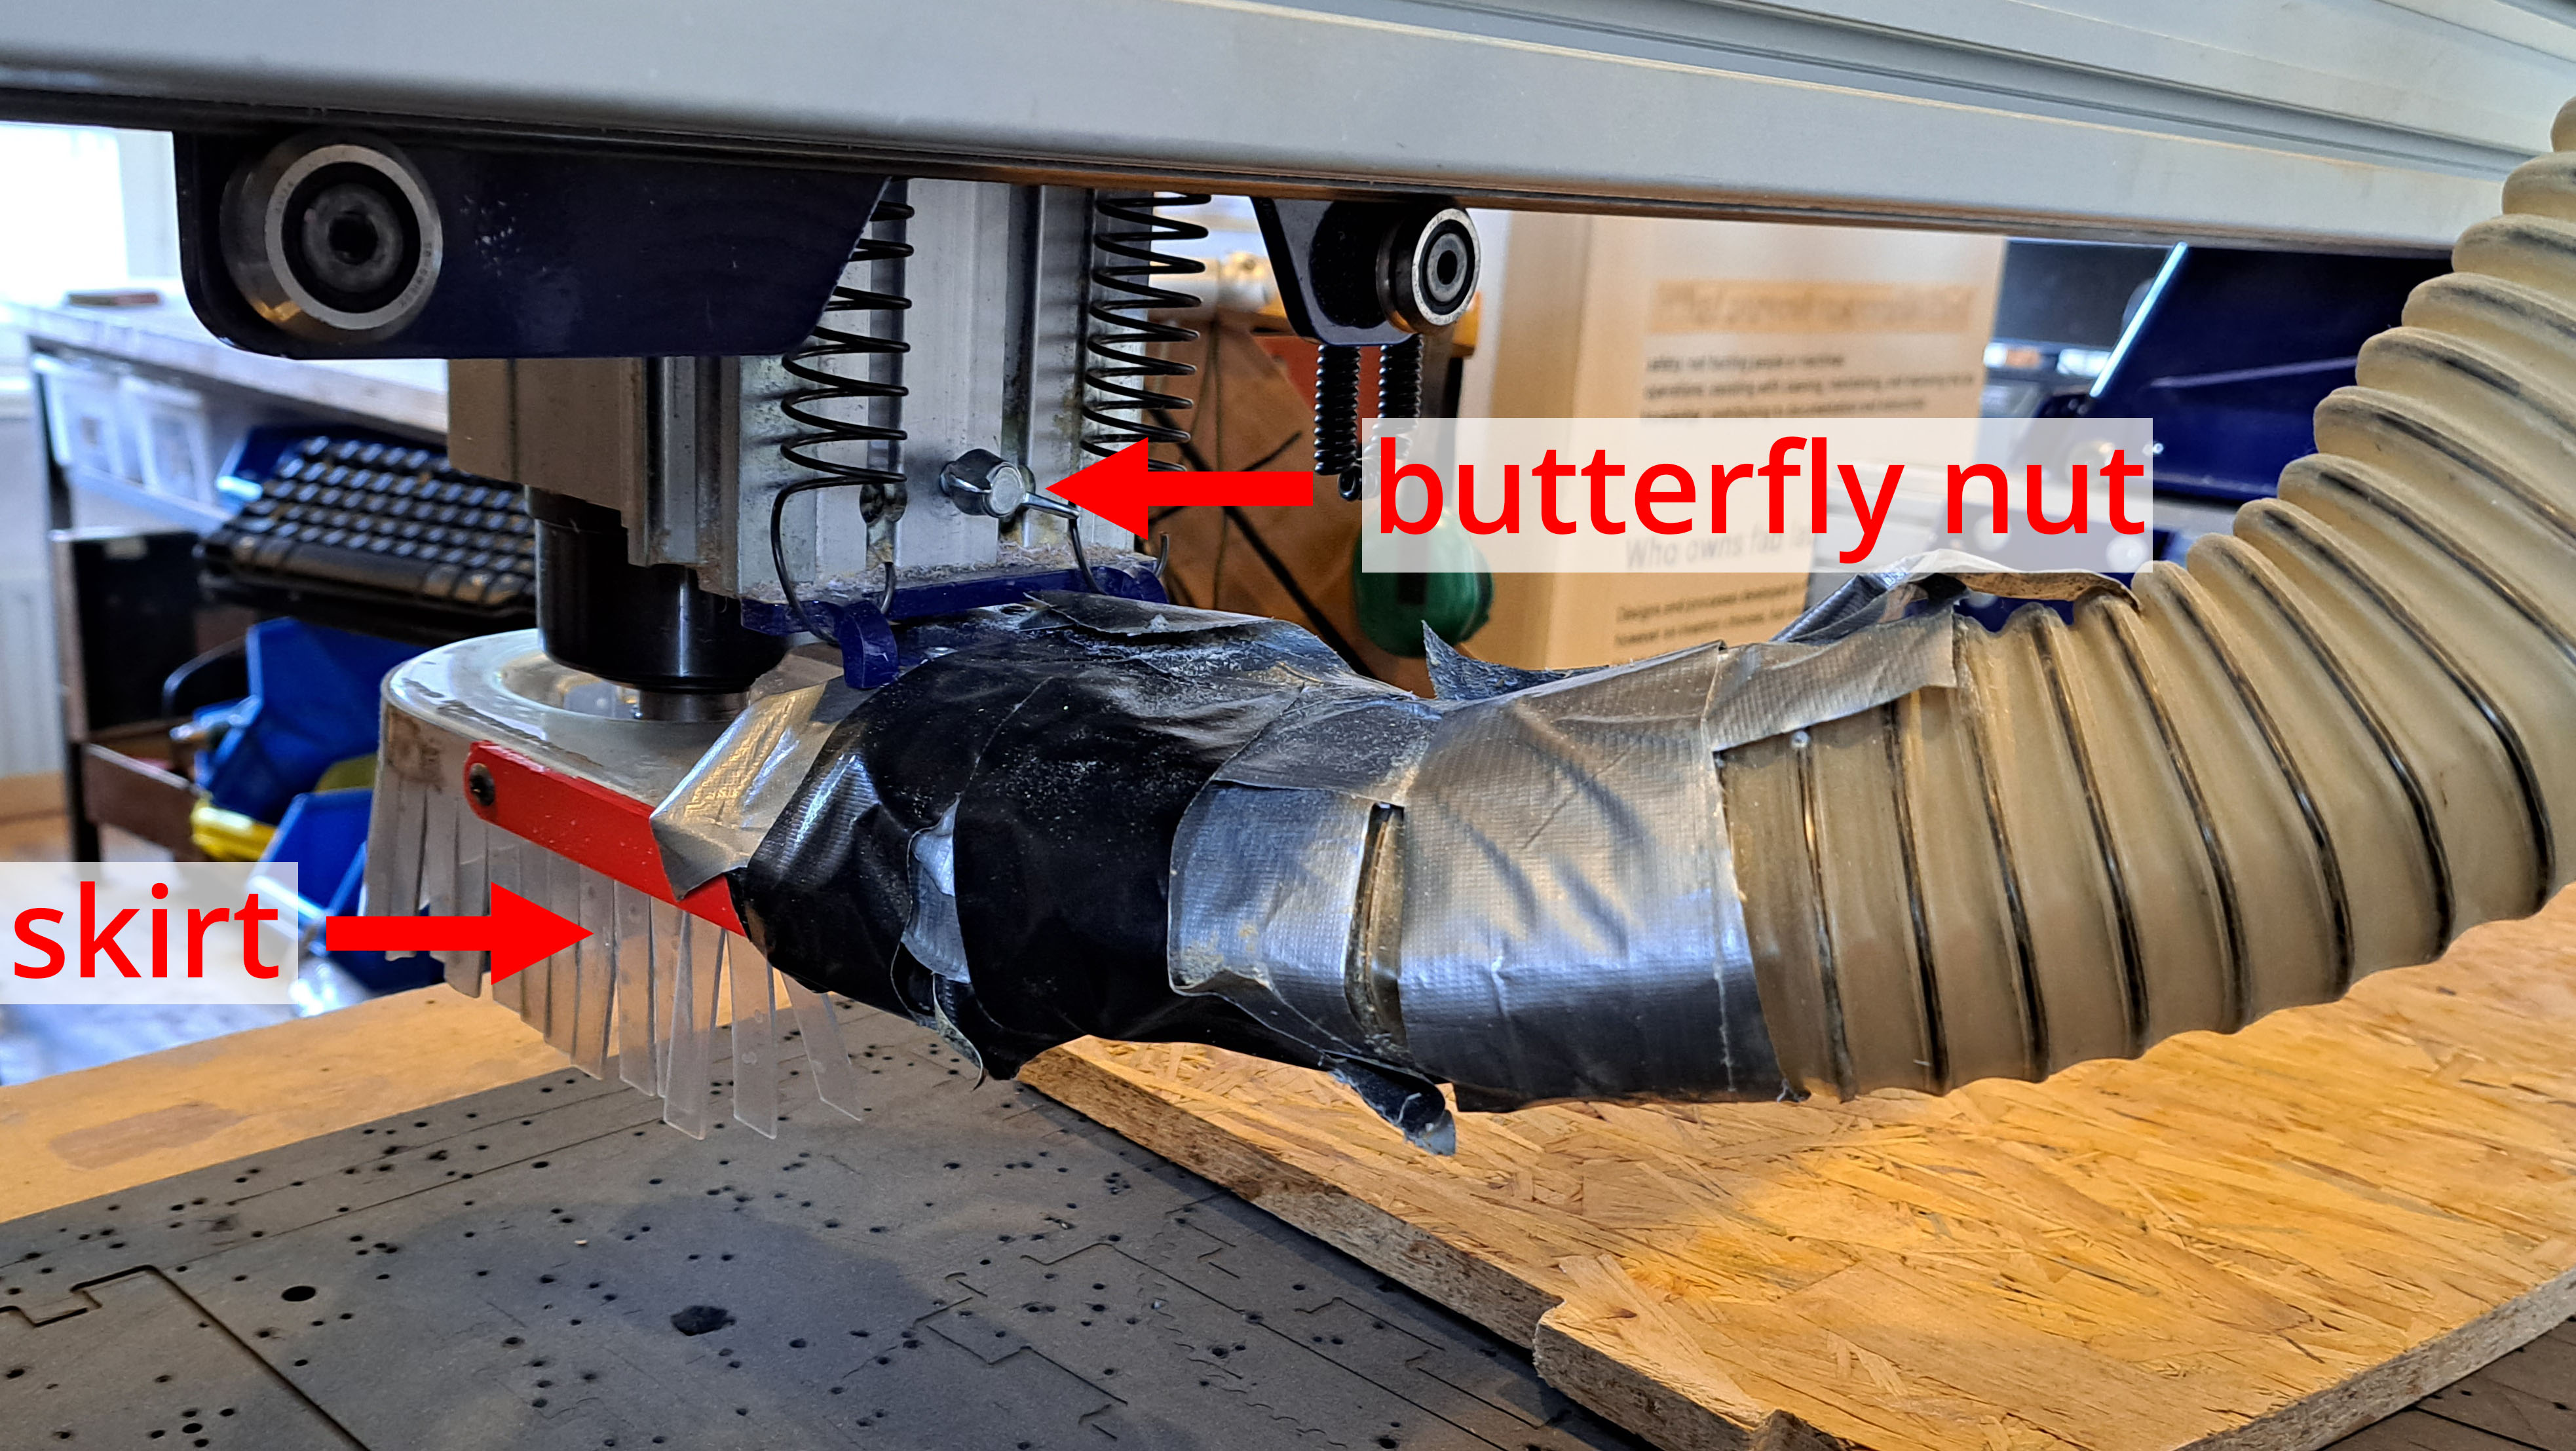
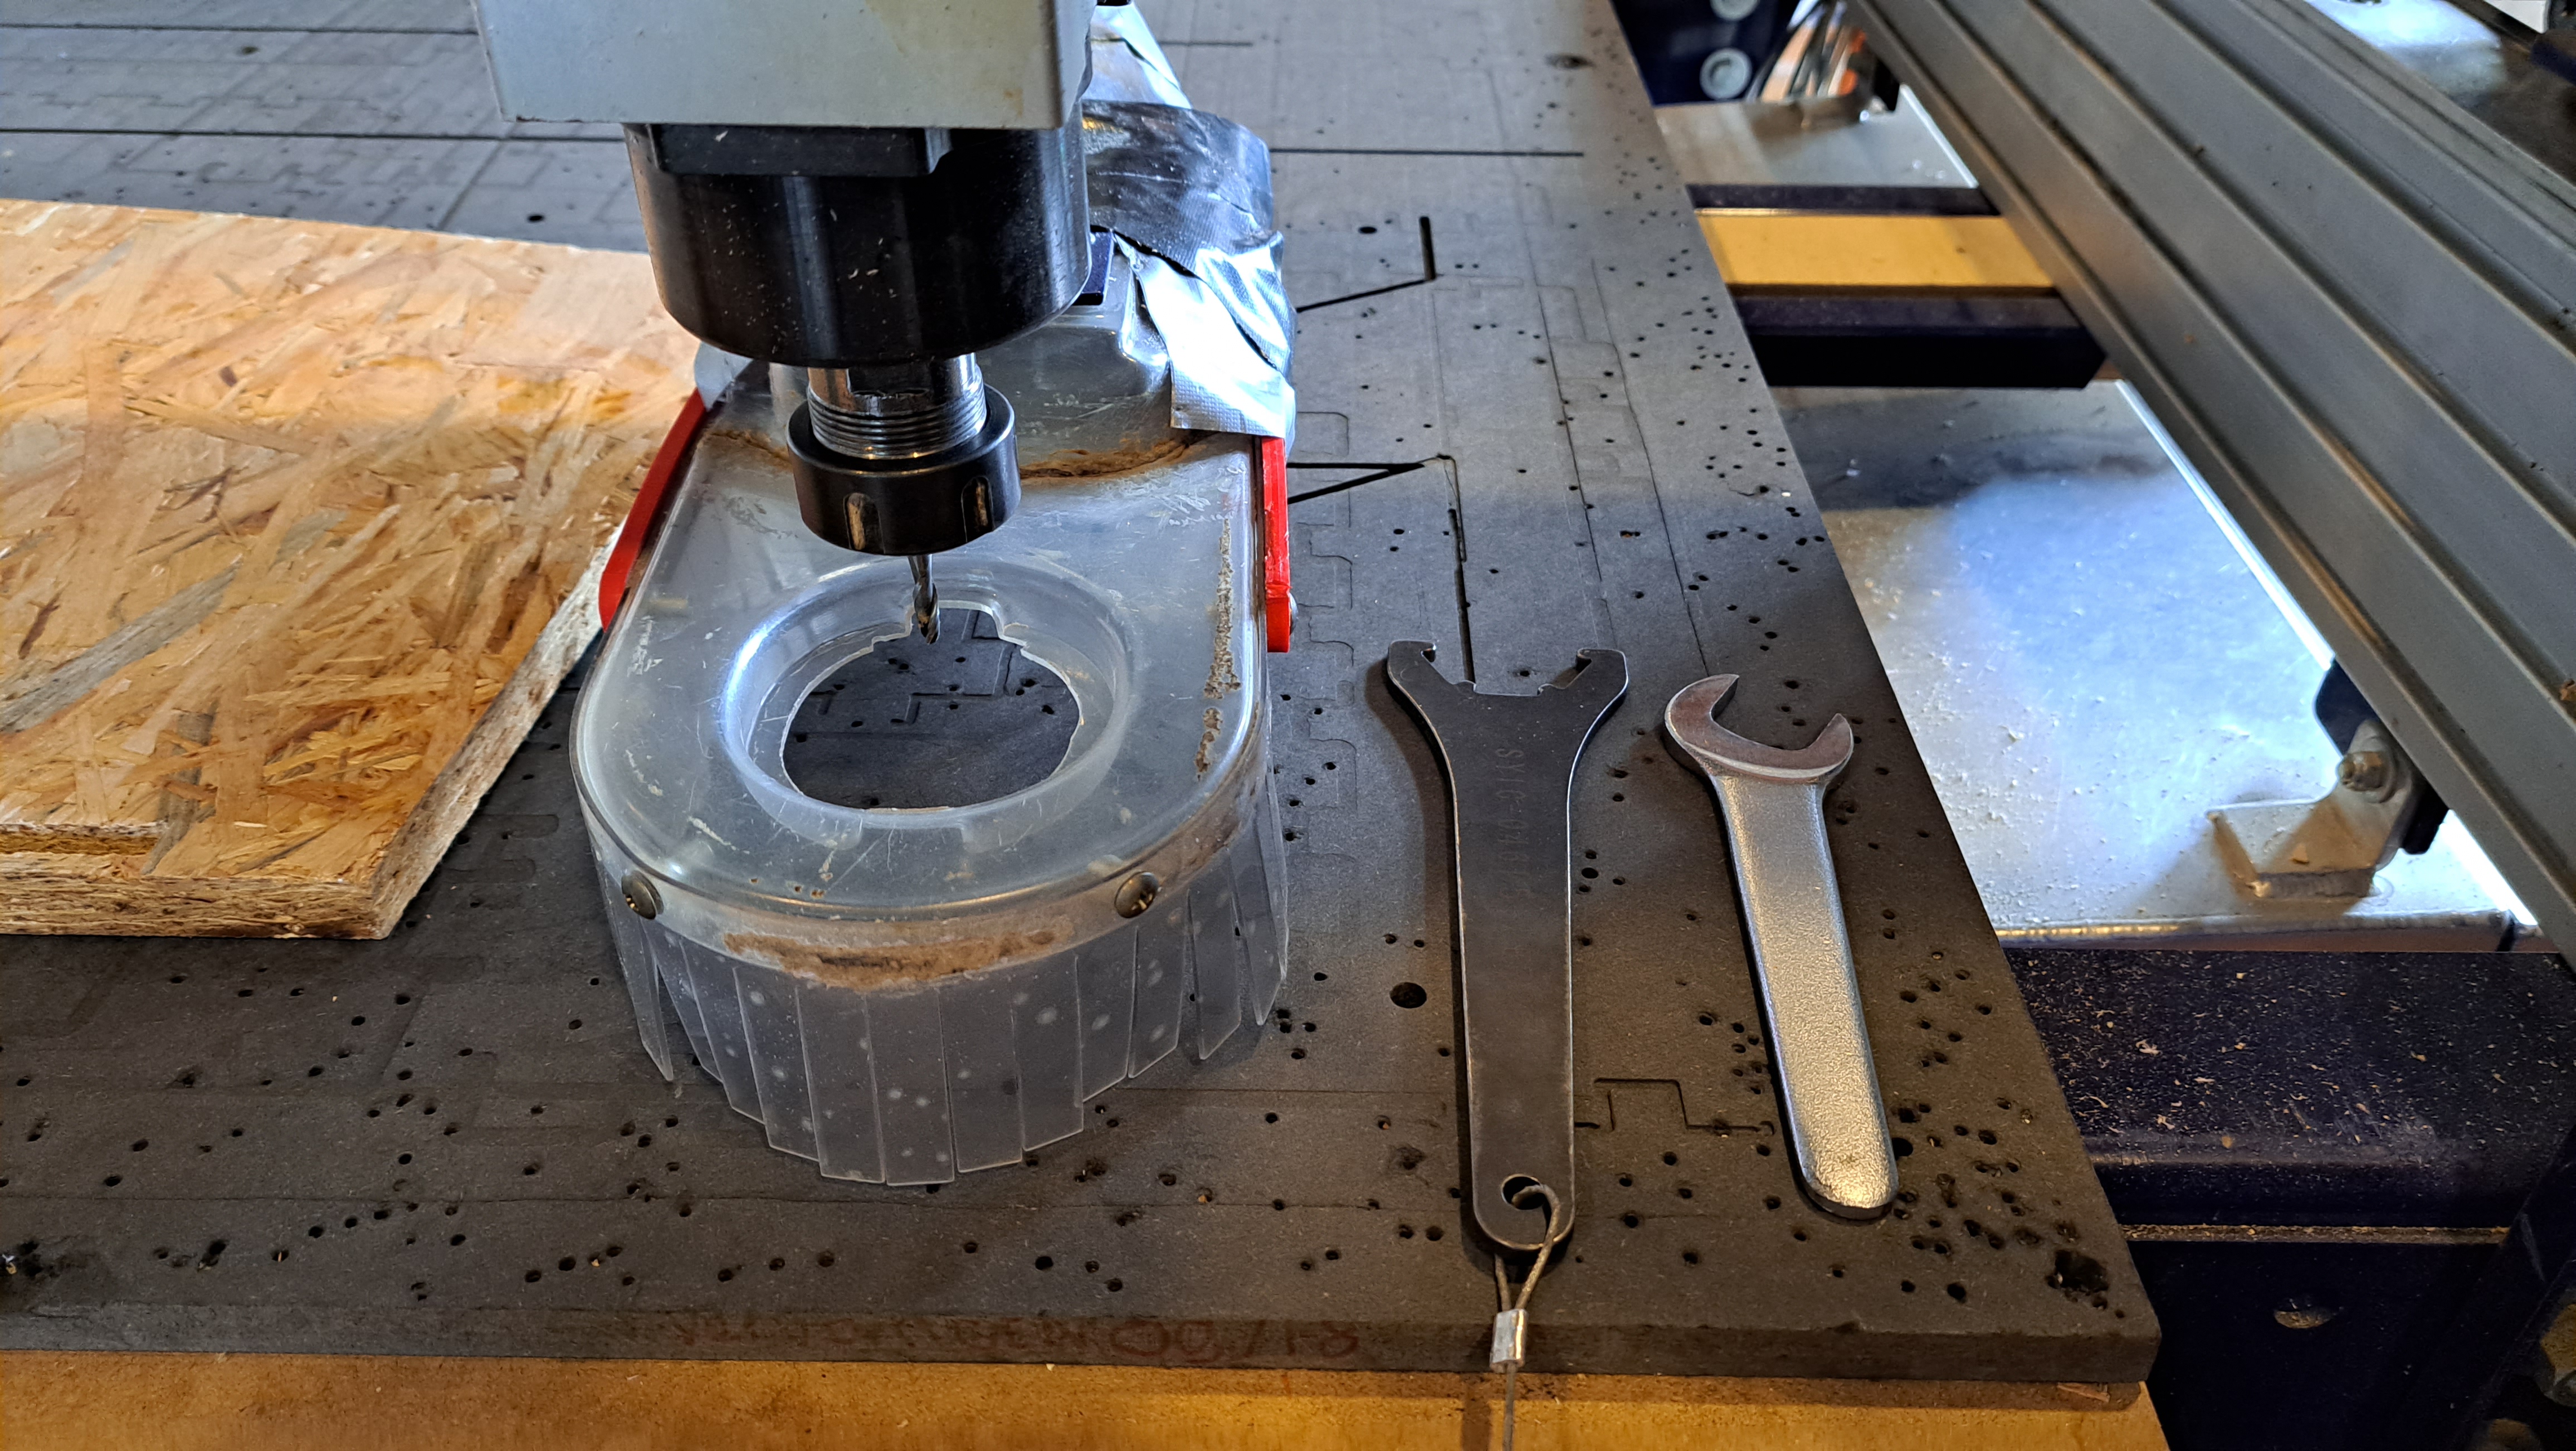
- Use the wrenches to loosen the clamping nut.
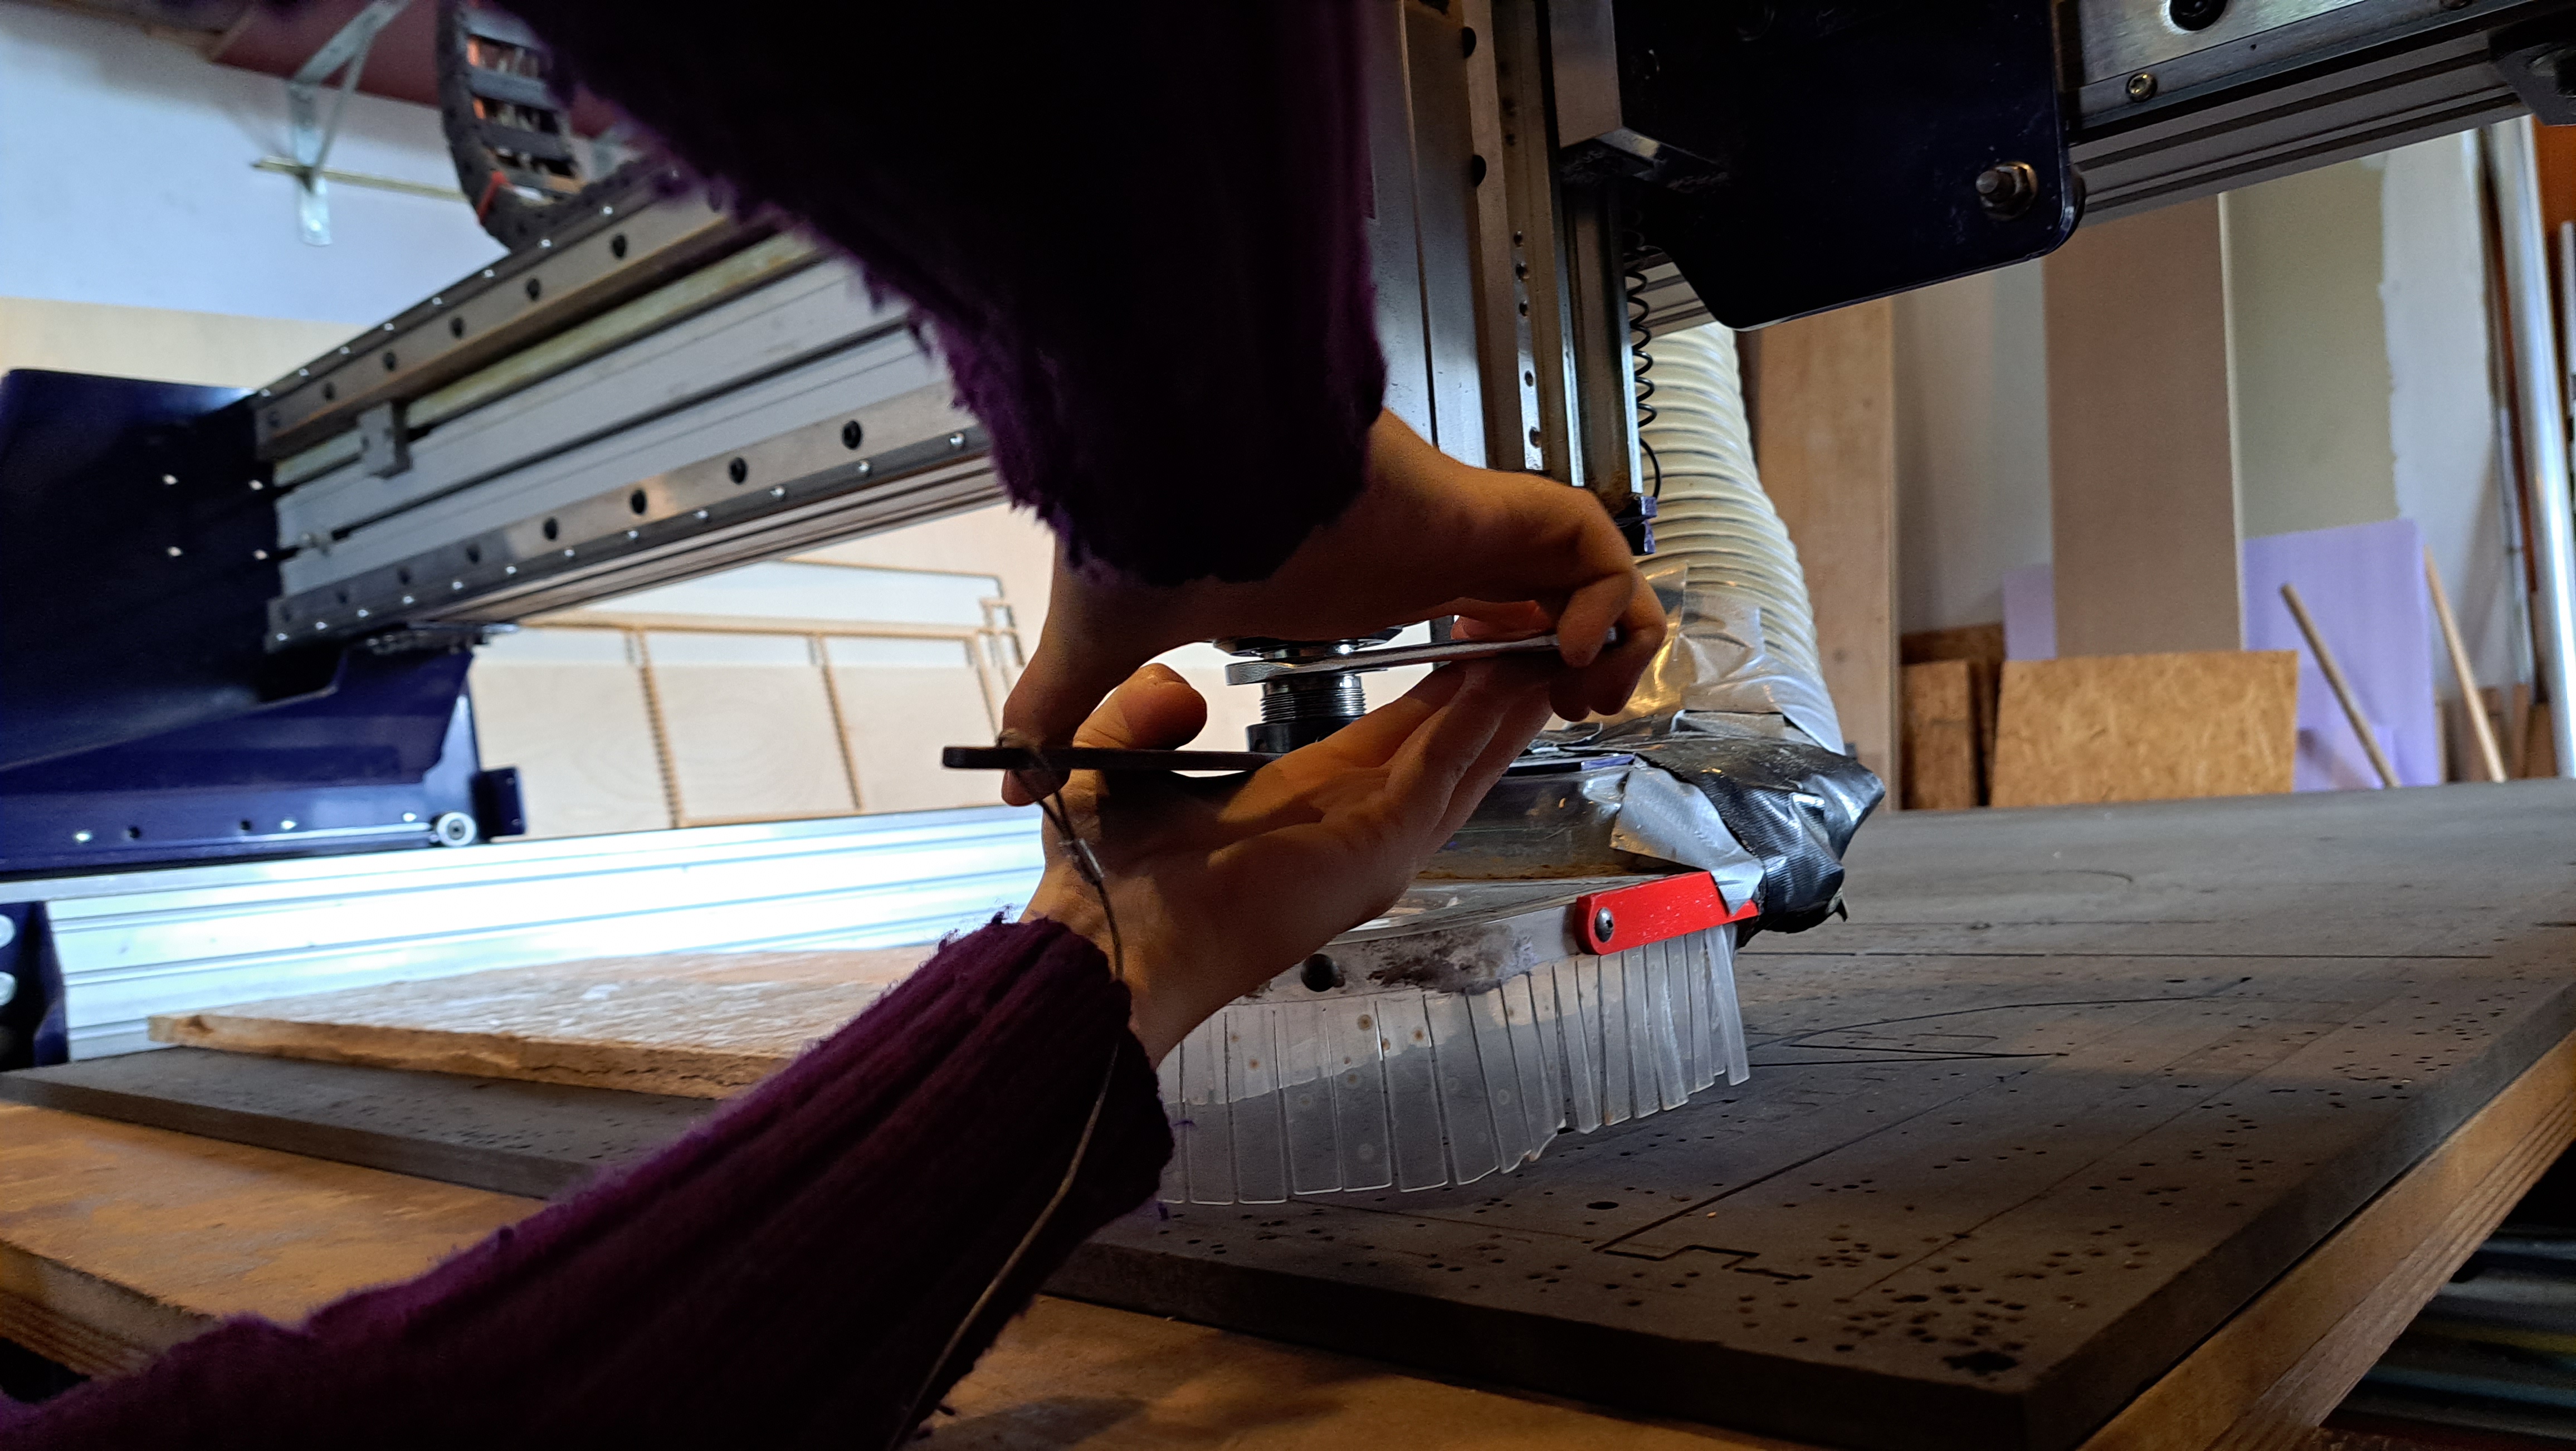
- When the clamping nut is loose, unscrew it from the milling head and take out the collet and the milling bit.
- Pick the milling bit and its corresponding collet you would like to use in your project.
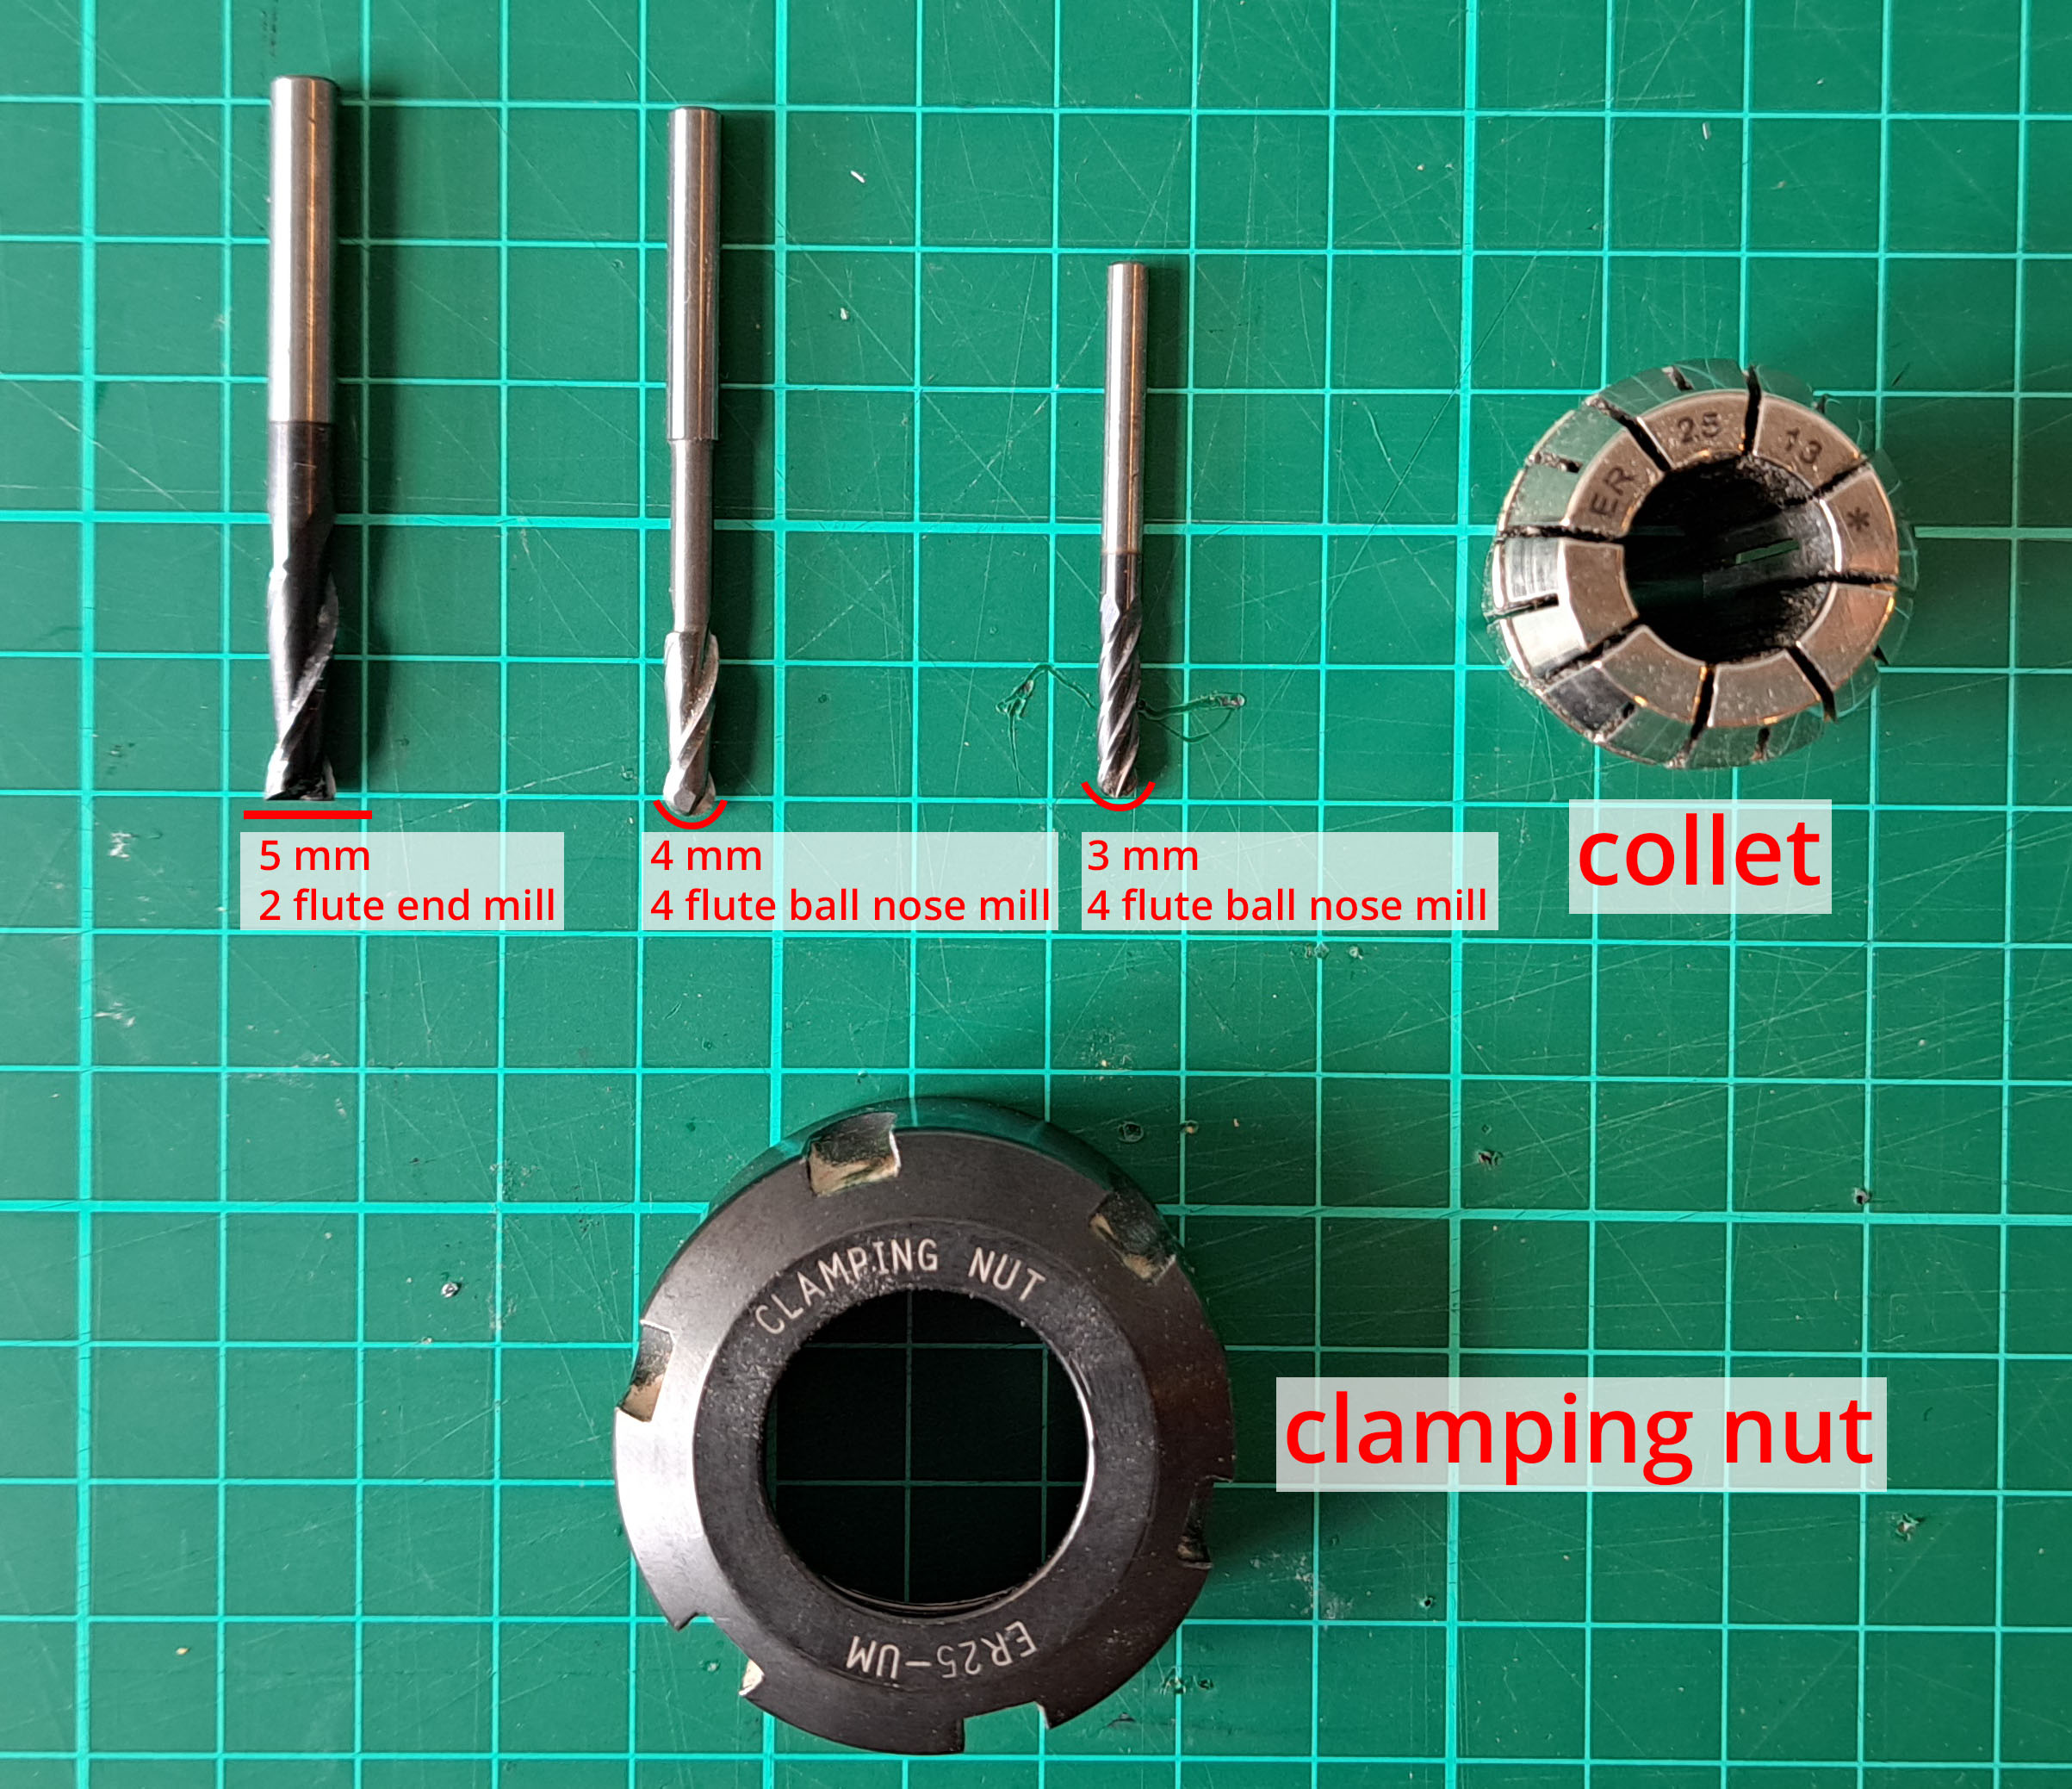
- Place the collet in the clamping nut and push until you hear a click. Then place the milling bit in the collet up until it is flush with the inner set of teeth inside the collet.
- Assemble the whole part back following the steps of removal backwards.
Milling bits are divided into types according the their the shape of their tip, diameter and number of flutes. DIAMETER: the diameter decision depends on the detailing of the project. The bigger the diameter, the harder to produce fine details. TIP SHAPE: We use ball nose (rounded) and end mill (flat) type bits frequently at Fablab. End mill is used for regular cutting and pocketing jobs. Ball nose mill is used for rounded details. It is good for producing relief-like 2.5D work. FLUTE: Deep spiraled grooves along the bit. When you look perpendicular to the tip end, you can recognize how many flutes there are on the milling bit. The more flutes there are, the more precise the job is.
Open VCarve Pro software
OPEN NEW FILE
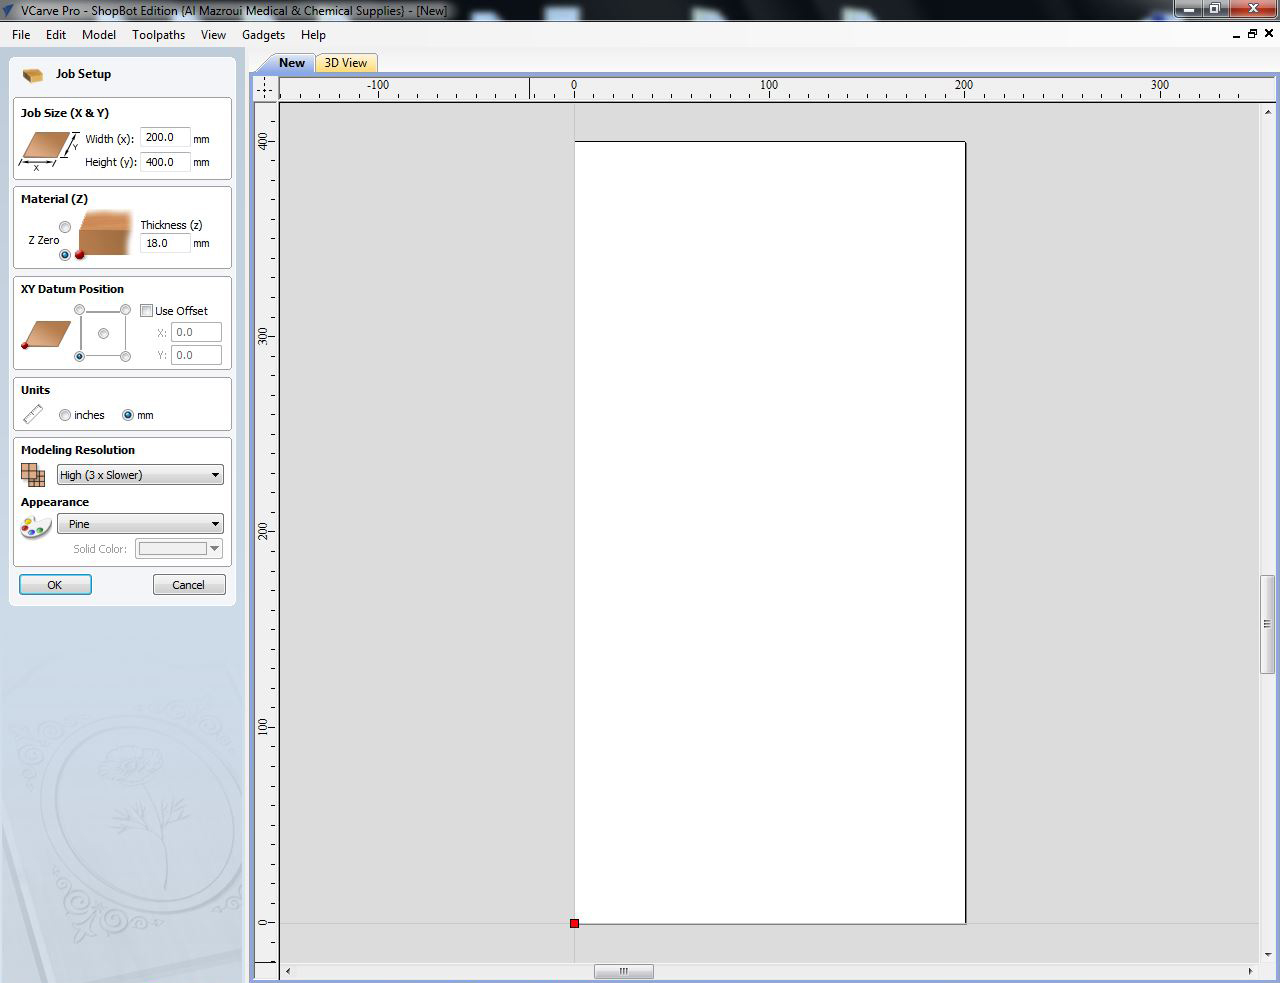
JOB SETUP
Job size (X & Y): indicates the maximum extents the tool will go. The maximum values can be the length and width of the material. The orientation of the material on bed should be the same as the orientation on the screen.
Material (Z): Enter the maximum material thickness measured. Pick the bottom of the material for jobs that will cut through the whole material. Pick the top of the material for carve-in jobs.
XY Datum: Usually, left bottom corner is selected.
Unit: mm
Hit save.
DRAWING
We bring in a drawing we have drawn before. The supported file types are: dwg, eps, ai, pdf, pvc, v3d, v3m, crv, skp. However, we drew our own cut drawing for this tutorial.
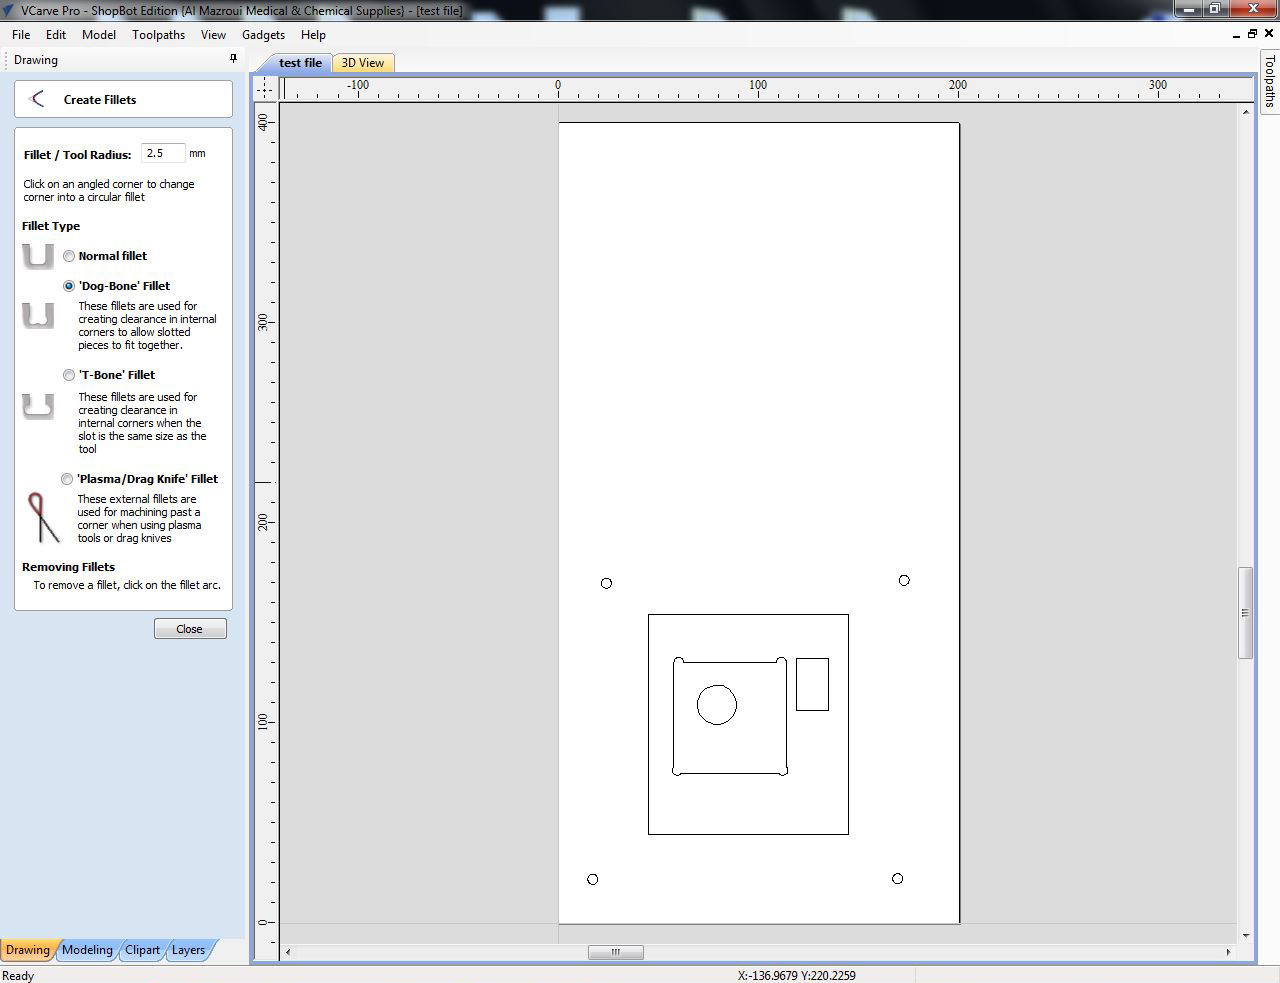
Either way, first start with drawing circles where you want to put the screw holes. You will later use these holes to fix your material on the sacrificial layer.
Fillets: The thickness of the milling bit does not allow making straight 90 degree angle cuts in the pockets and interior profiles. Therefore, it is especially important to add T-bone or Dog-bone fillets if you will use the cut profile to fit parts together.
SAVE FILE
VCarve Pro's file extension is *.crv
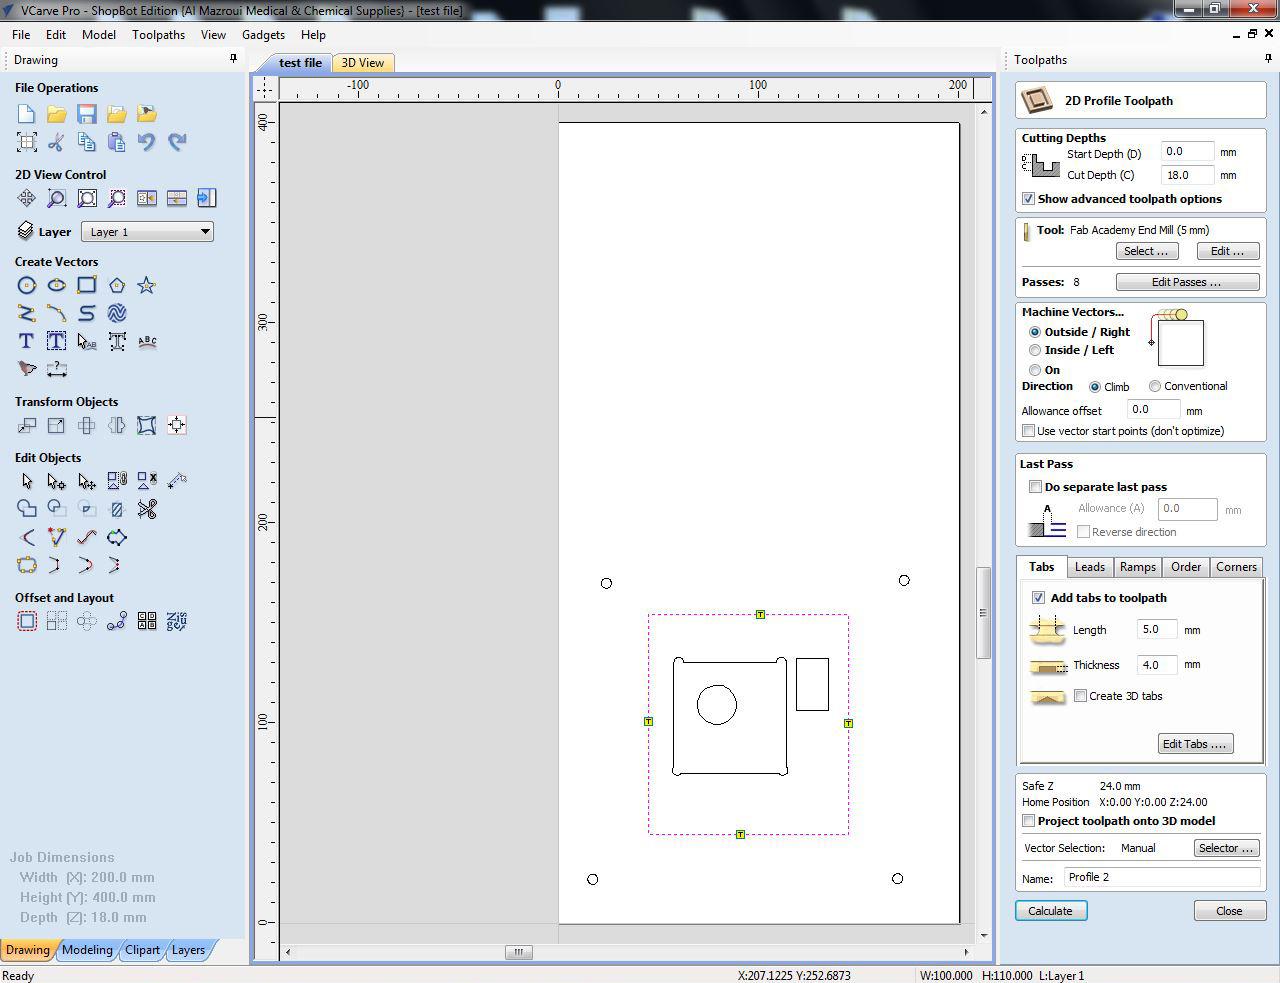
TOOLPATHS
The order of toolpath creation should be: drilling, pockets, inner profiles, outer profiles. Everytime you make a change, hit Calculate.
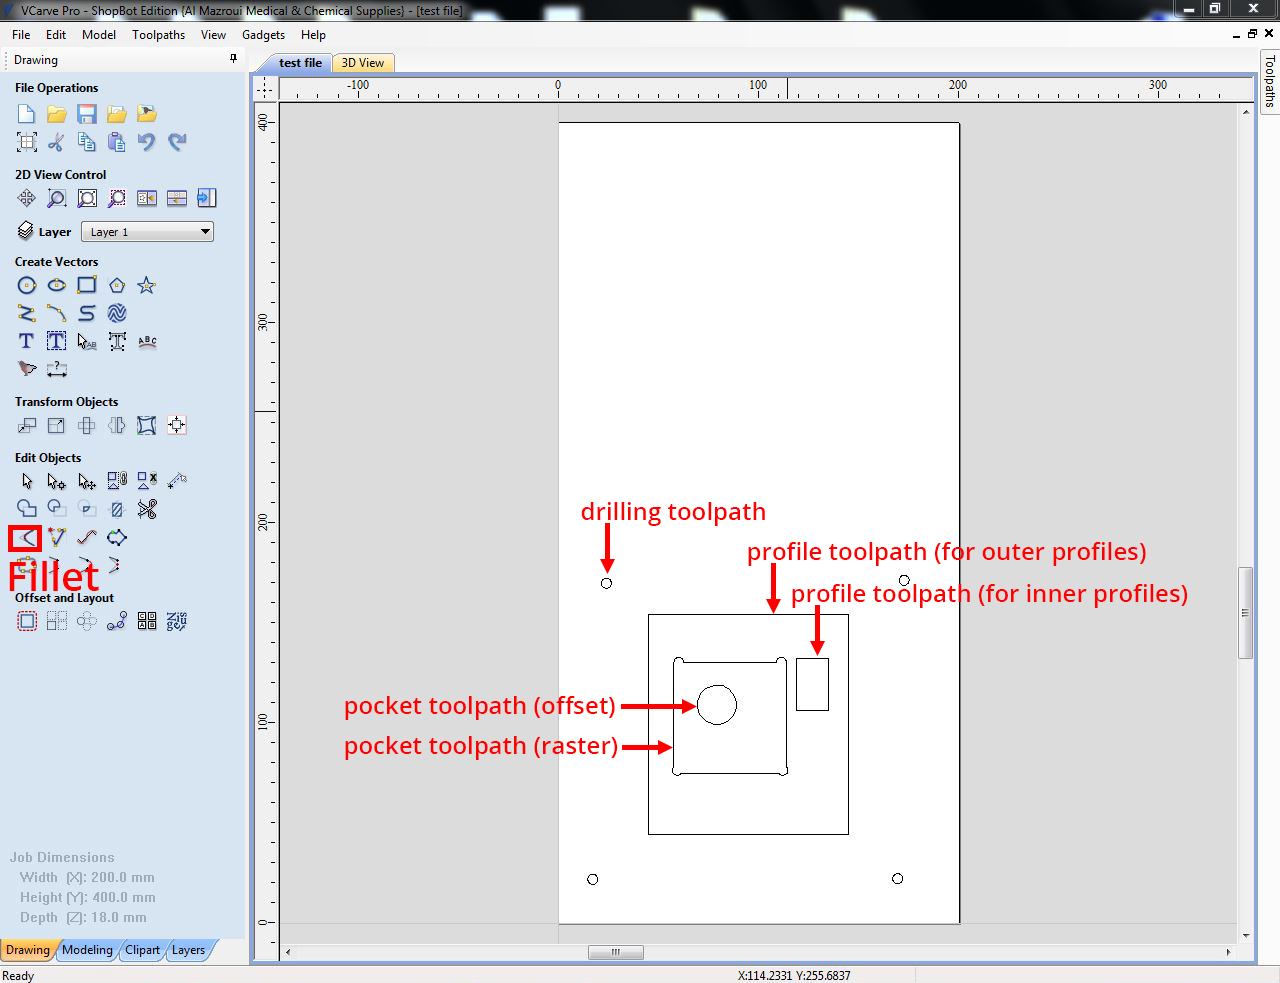
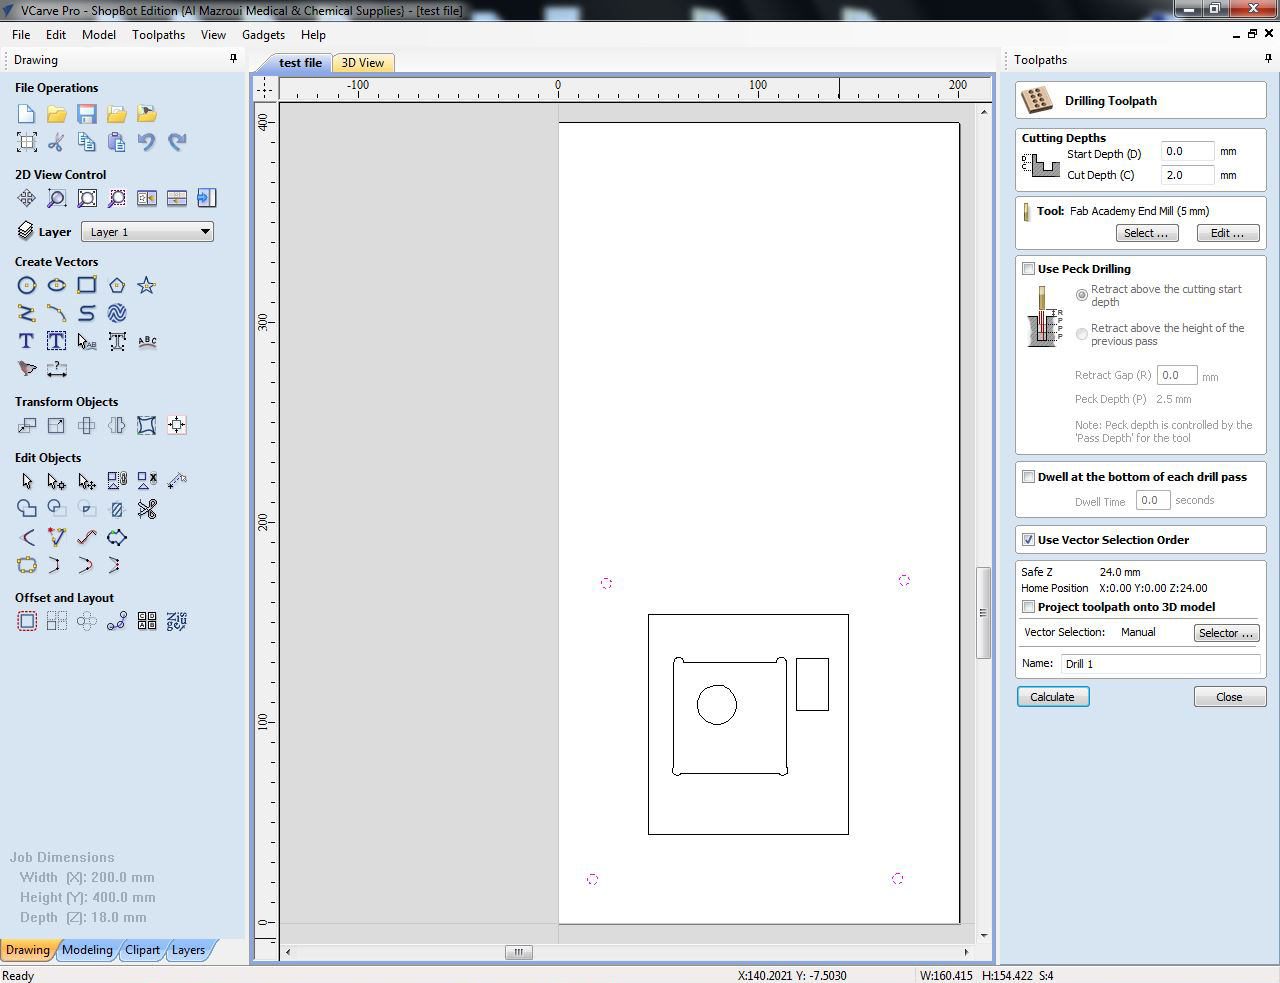
1. Drilling toolpath
Start depth: 0 mm
Cut depth: 2 mm (it should be only deep enough to indicate places of the screws)
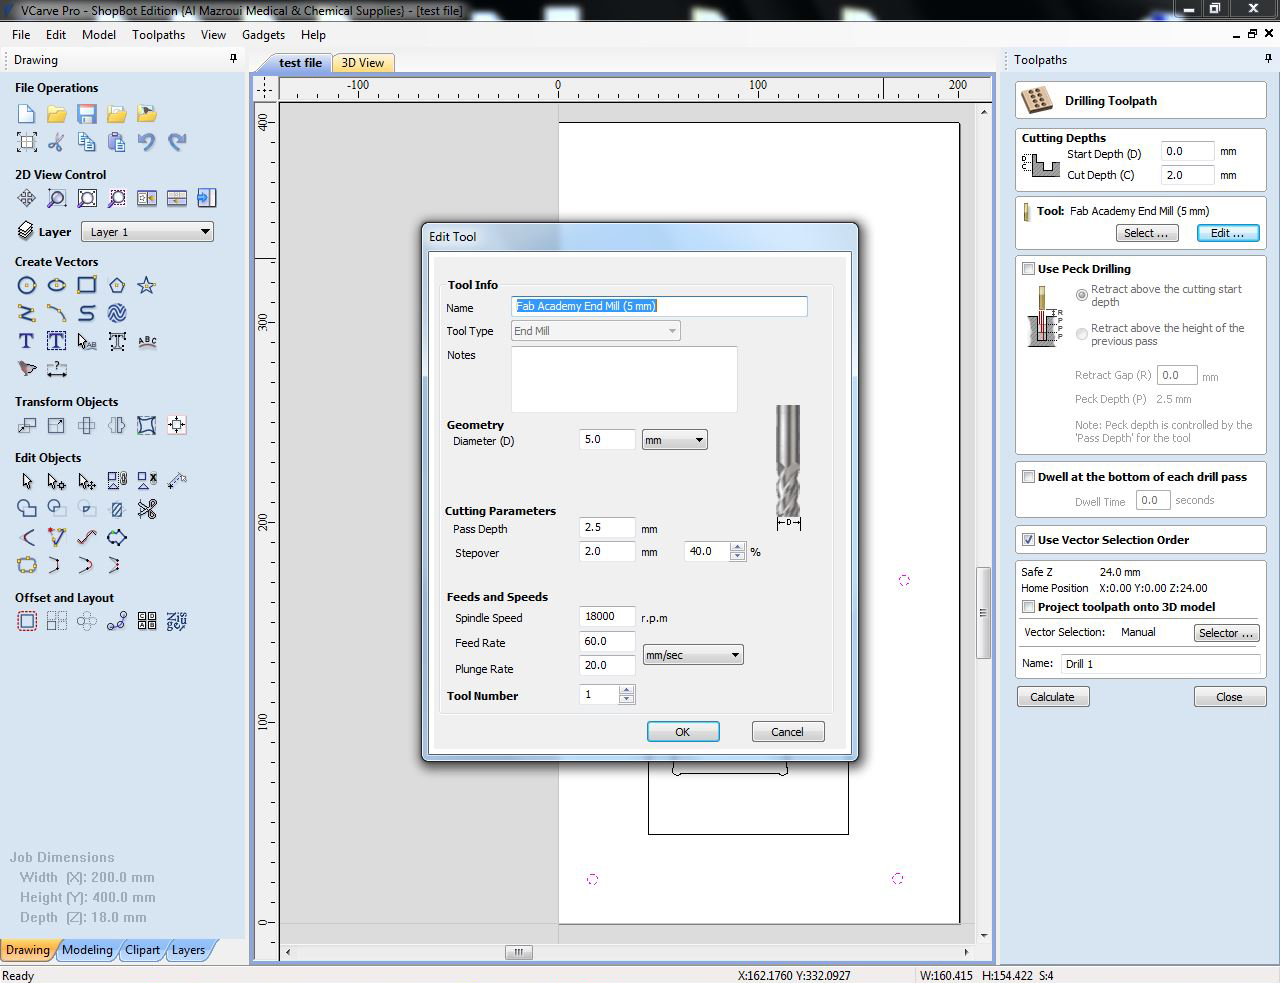
Tool: Select a tool from the list of preset tools. If you are going to make changes, do it in edit mode (so that the original settings do not change).
2. Pocket toolpath (raster)
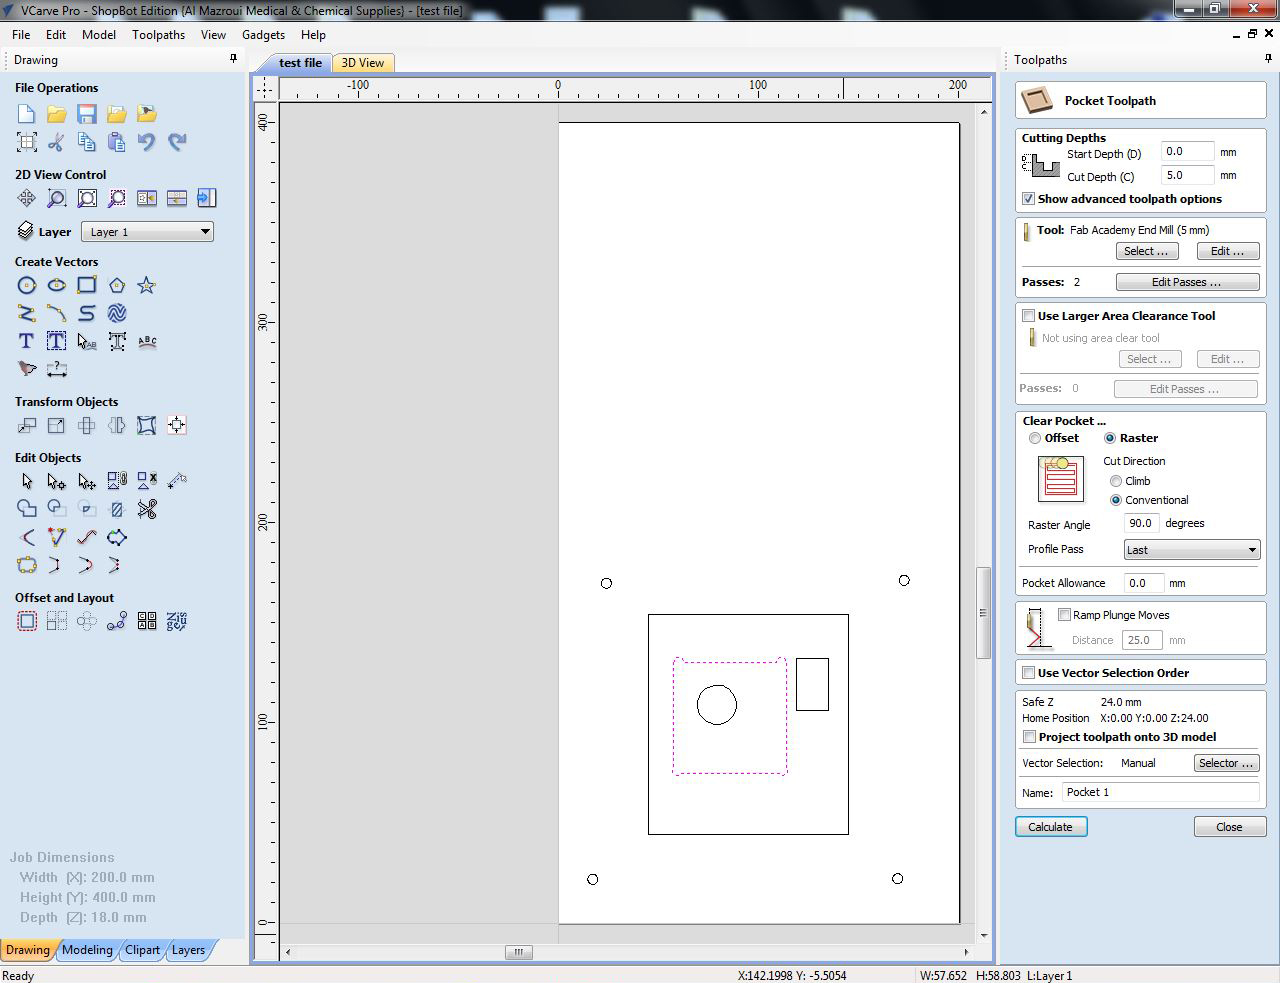
3. Pocket toolpath (offset)

4. Profile toolpath (for inner profiles)
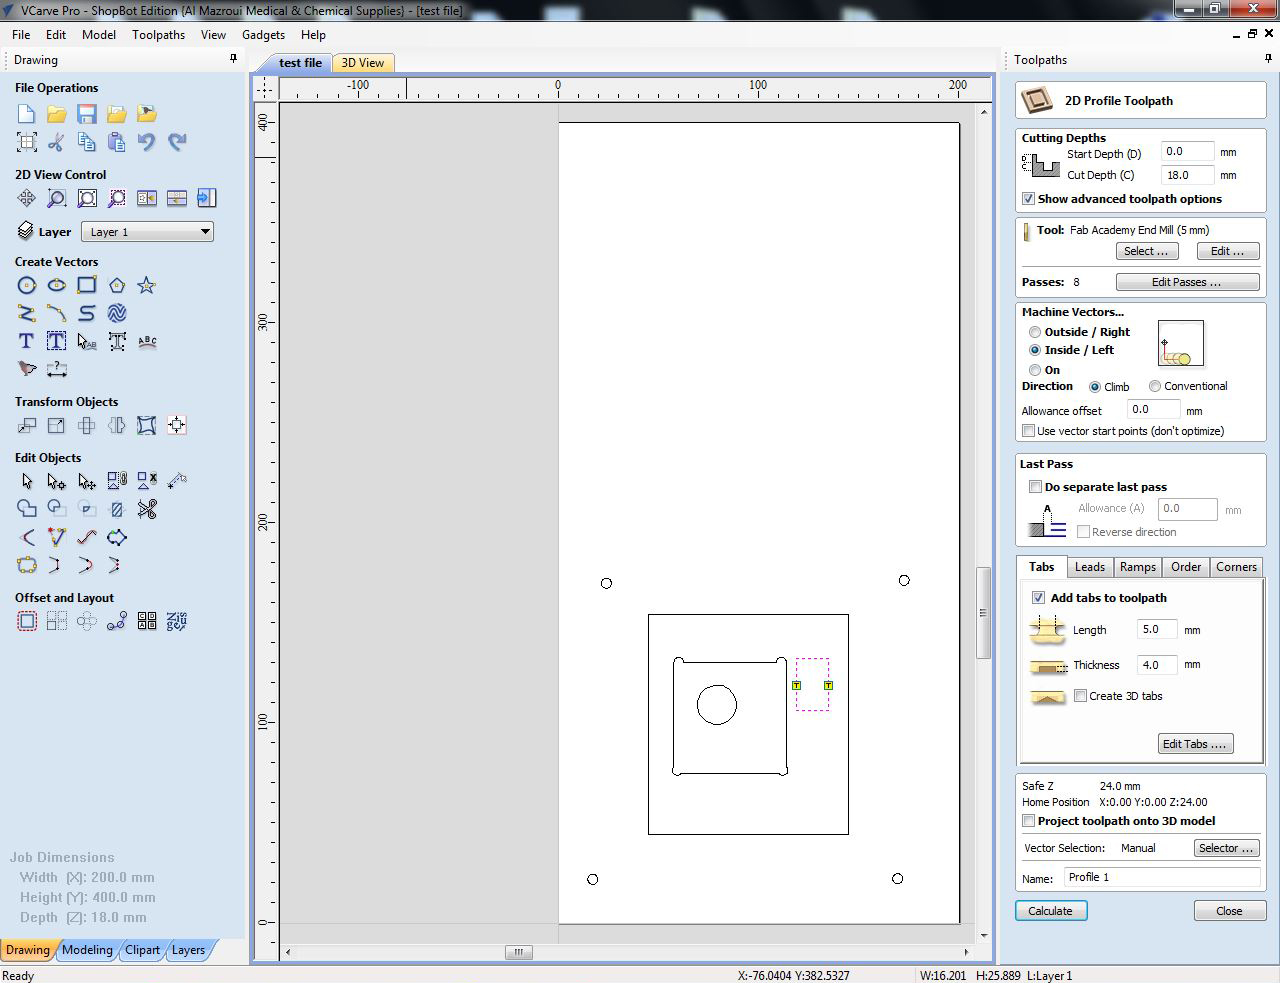
5. Profile toolpath (for outer profiles)
SAVE TOOLPATHS
File type for Shopbot 3 is *.sbp
IMPORTANT: Save drilling toolpath separately from the rest of the toolpaths. Because firstly, you will use the drilling toolpath to make marks for screws and then put screws there. And then you will run the rest of your milling job.
Safety First
- Always Use safety earmuffs and safety glasses, while operating the machine.Go back to Shopbot 3 software
- Click on Zero XY: this will move the milling head to the absolute XY origin.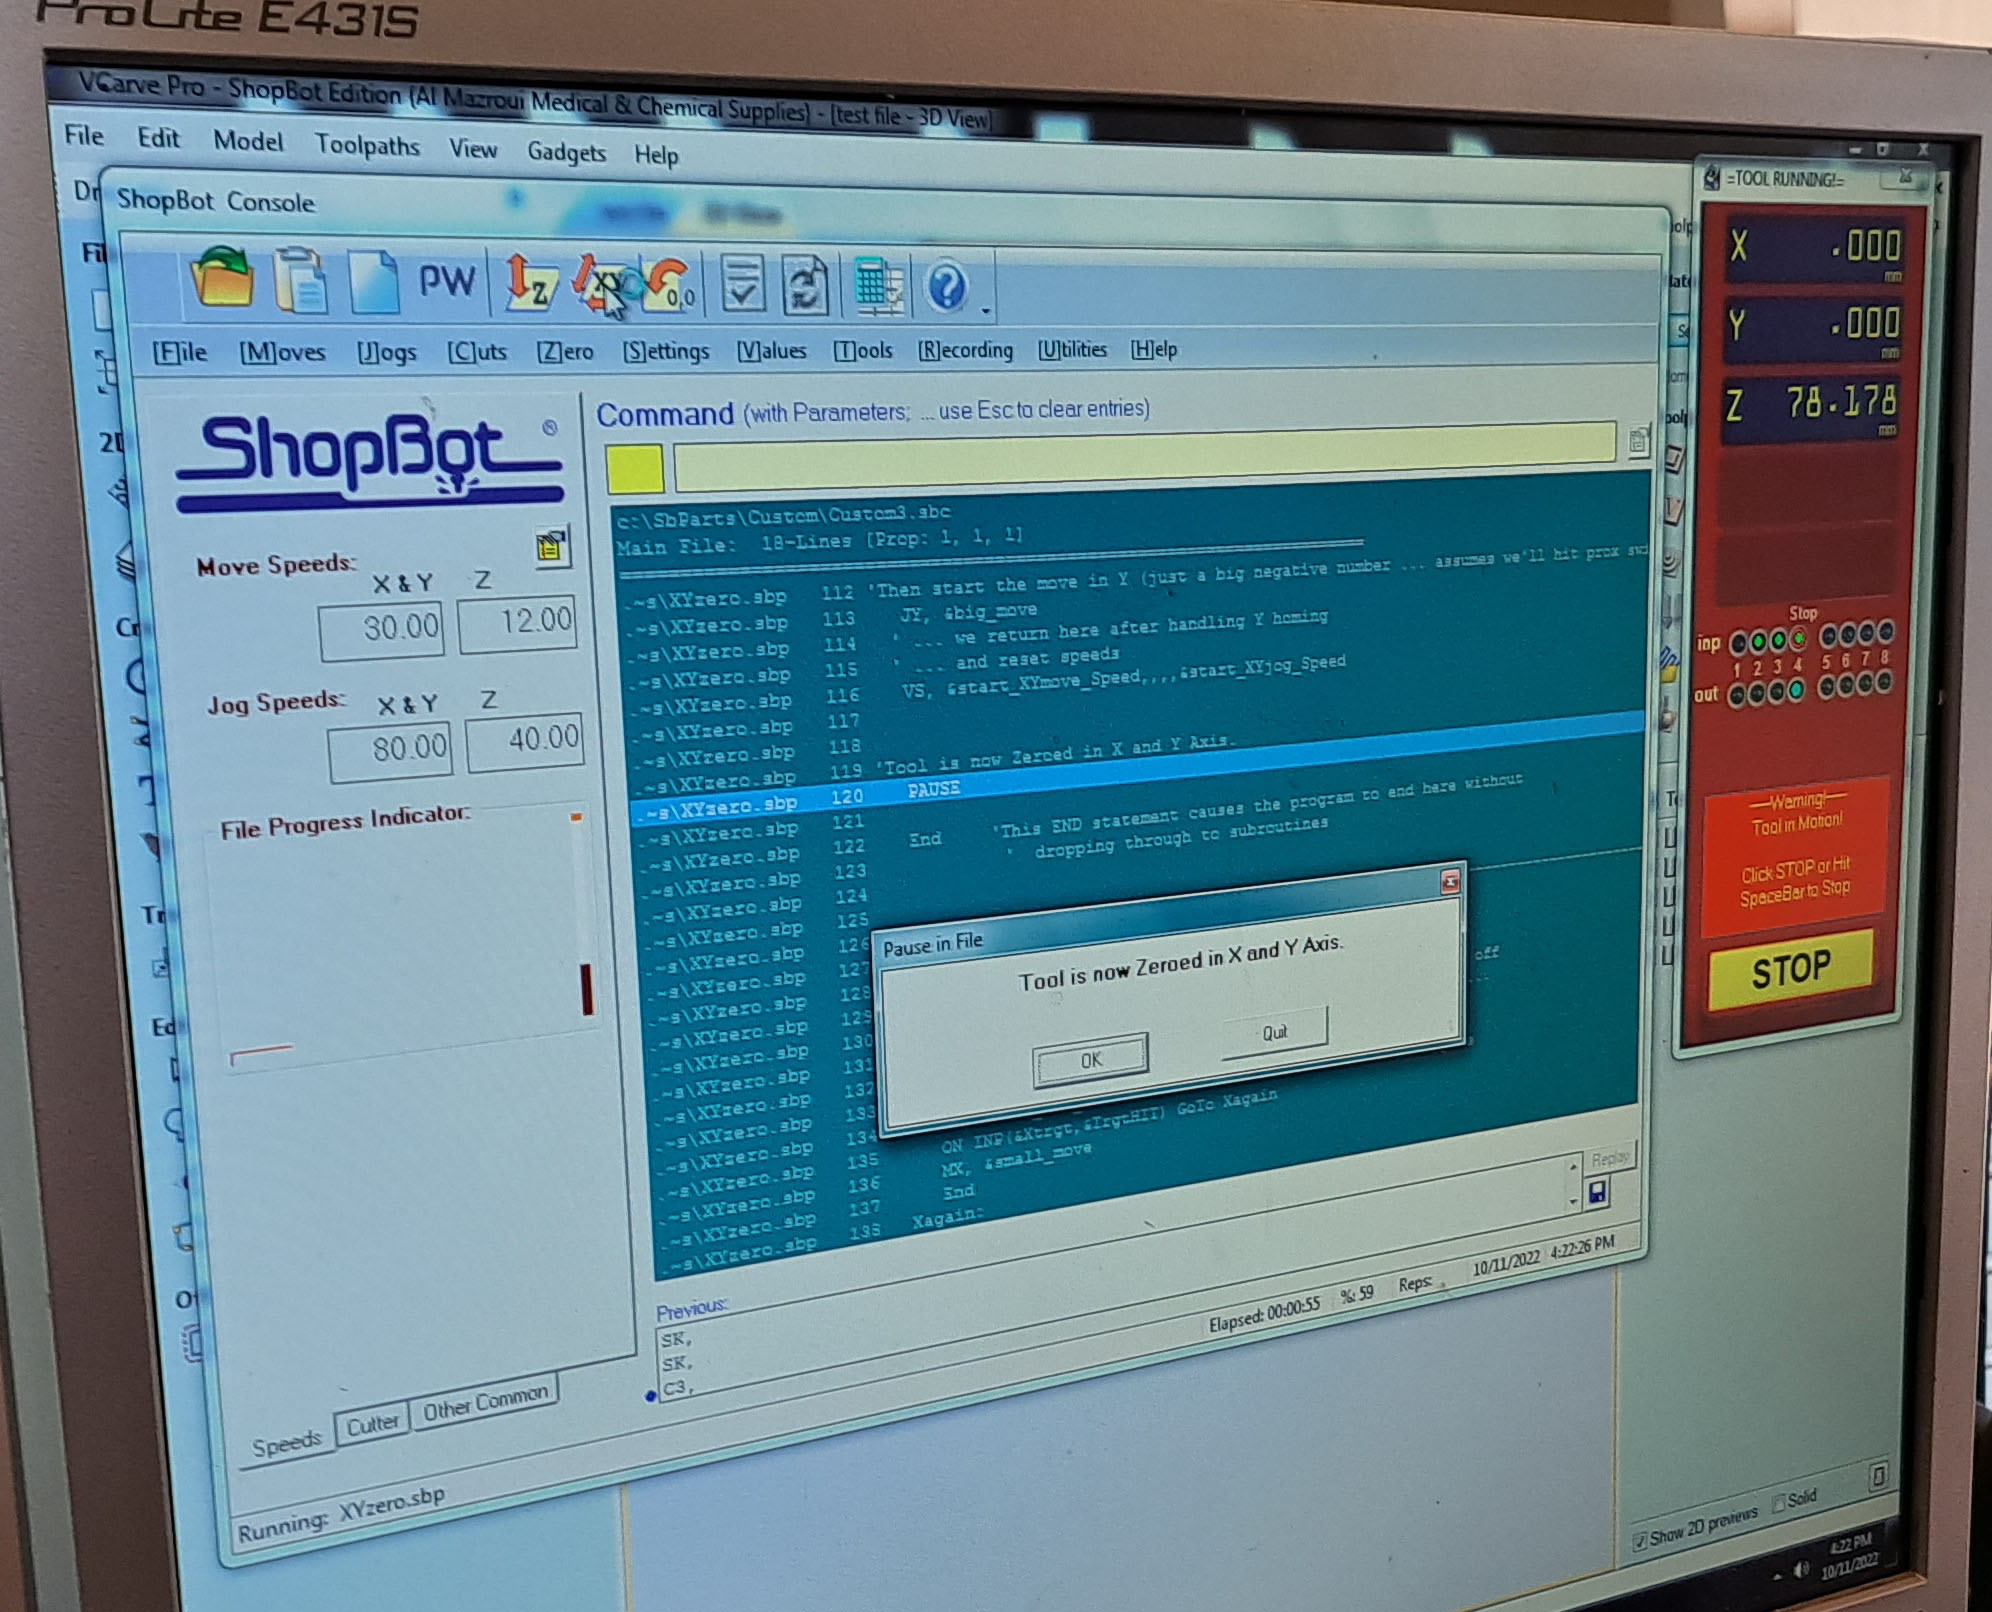
- Move the milling head to the location where you want the new XY origin to be with keypad.
- Hit Zero > Zero [2] axes (X): this will save the X and Y coordinates as the job's origin.

- Record coordinate values for X and Y on the Position screen somewhere. If anything happens and you need to stop the job, you can use these values to reset the job origin.
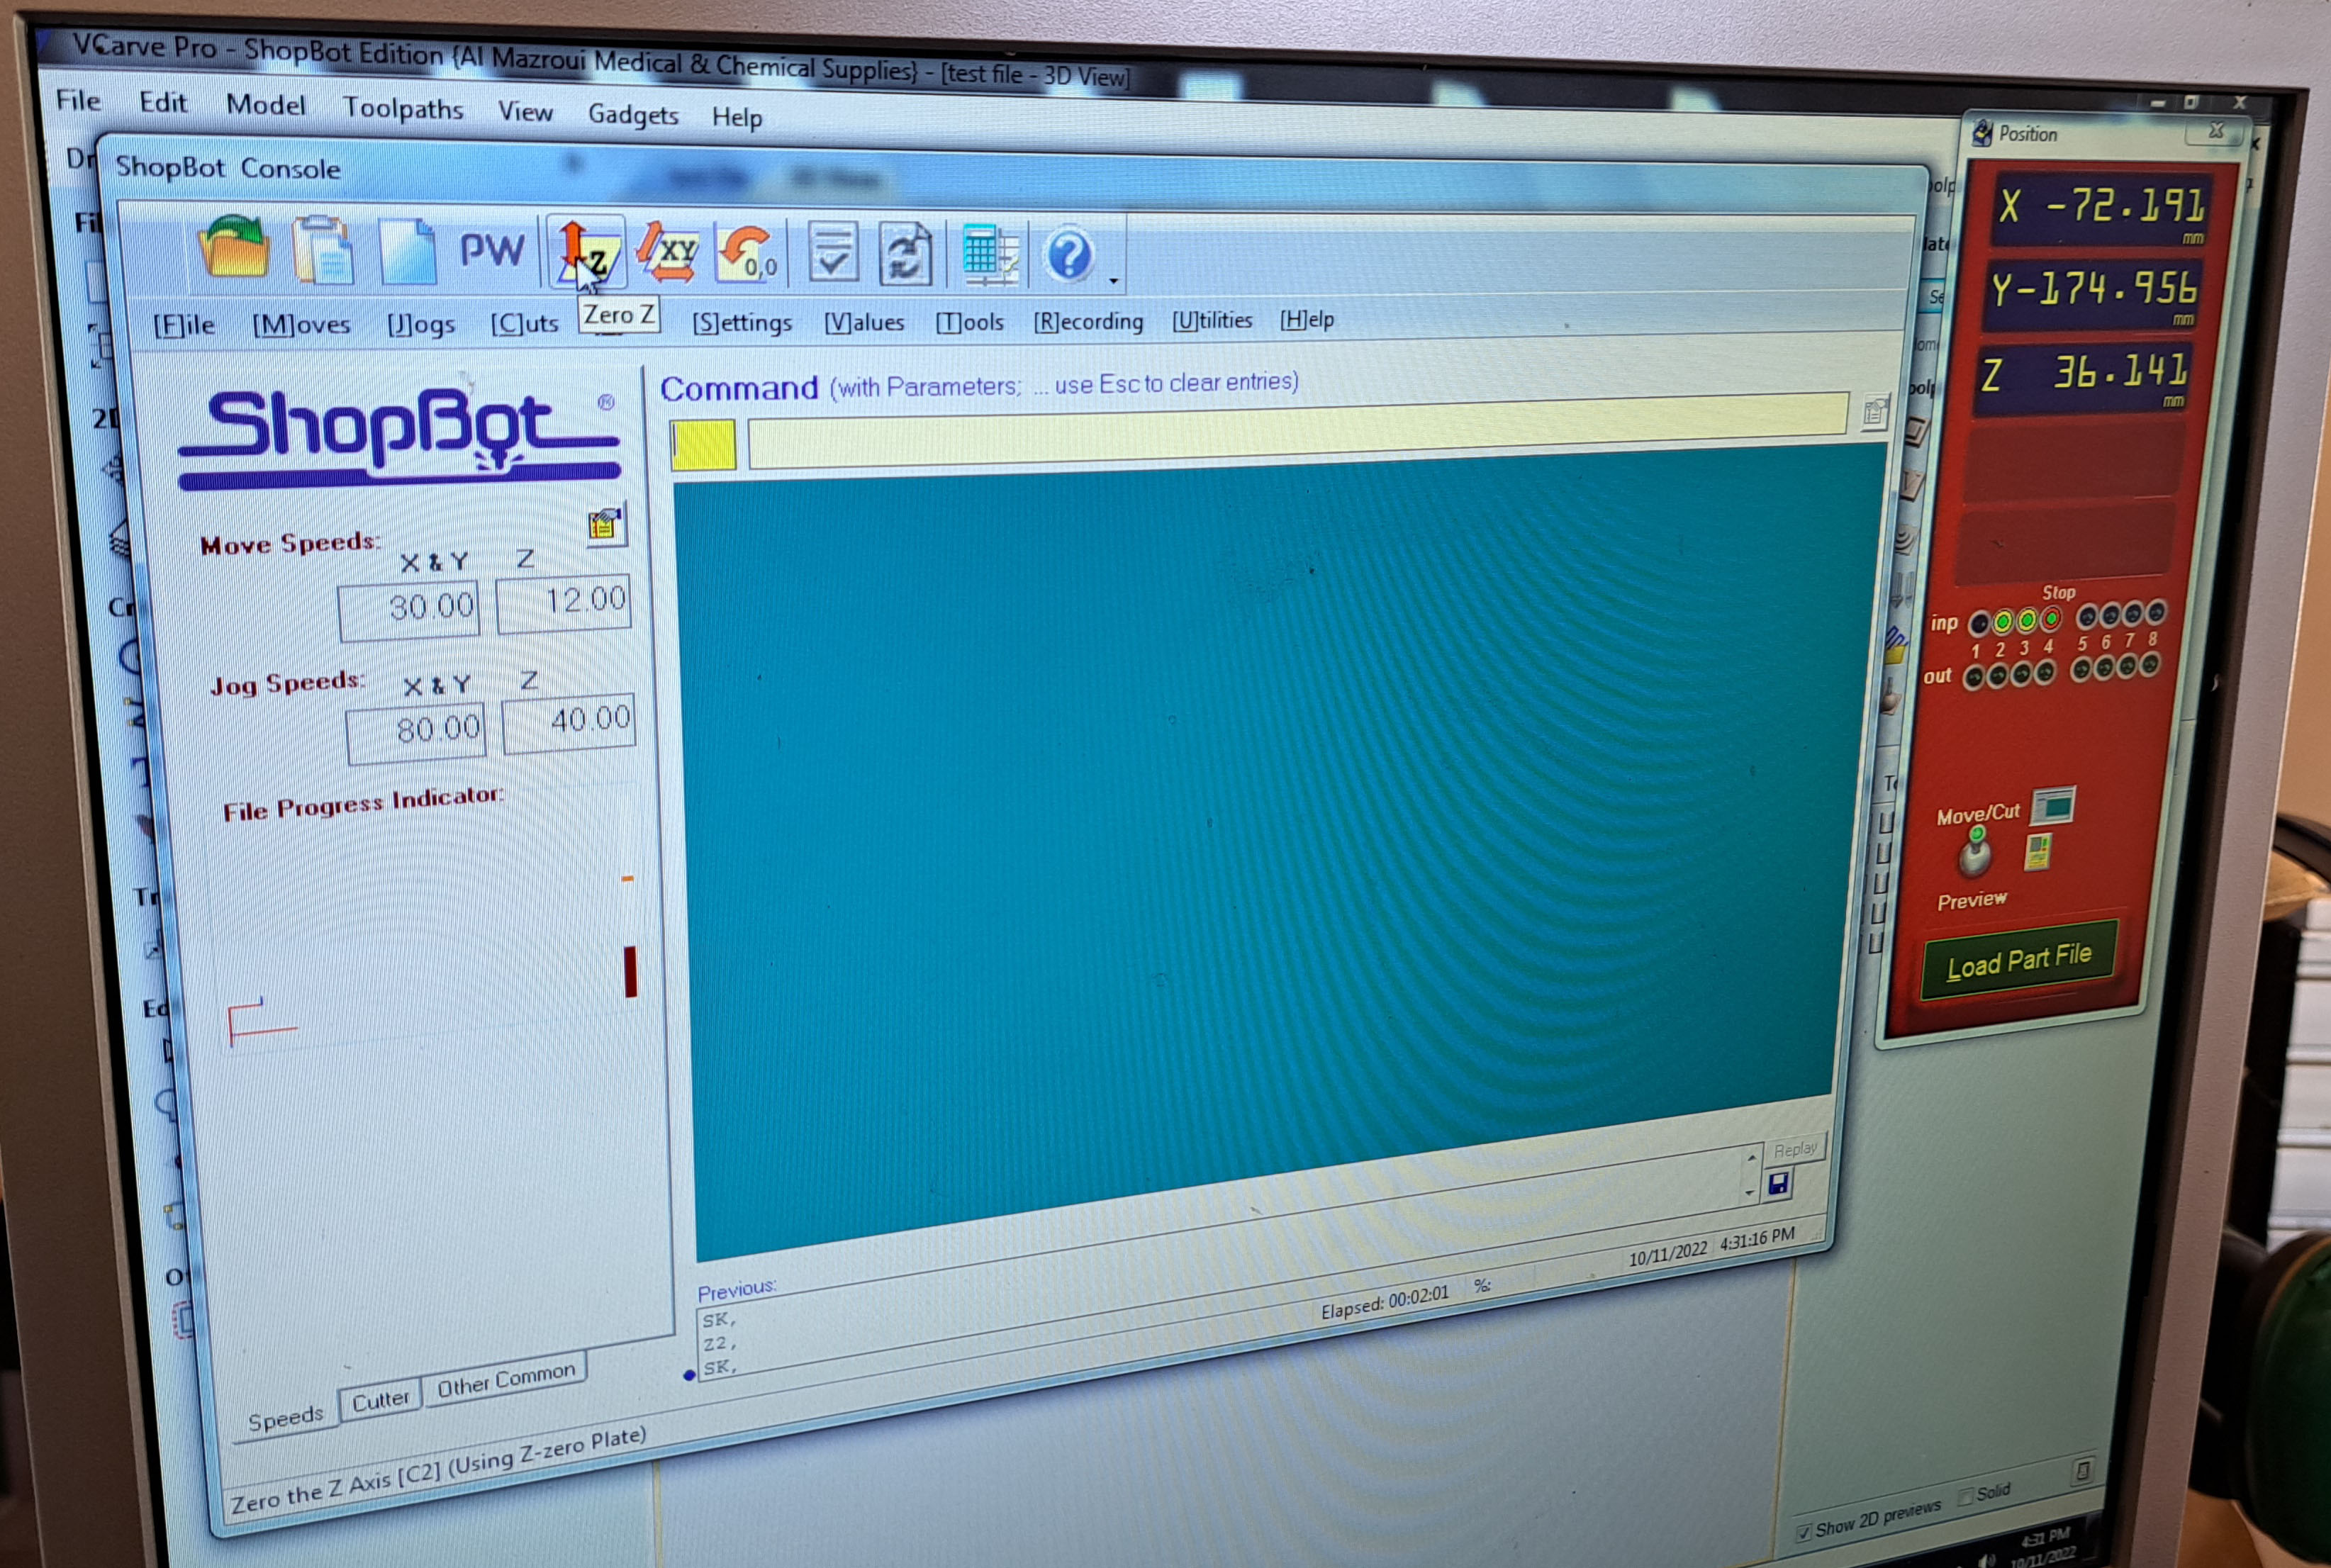
- To Zero the Z-axis: move the milling head above a clear surface on the sacrificial layer. Pick the metal plate from the milling head and touch it to the end of the milling bit. Touching the plate to the bit should close an electric current. If the current closes the left-most Stop, Inp 1 circle should turn green. Repeat this a couple of times to make certain the current is closed. This step is important because Z-axis will automatically move down and it should stop when it touches the metal plate. Put the matel plate under the milling bit on the sacrificial surface. Press Zero Z.
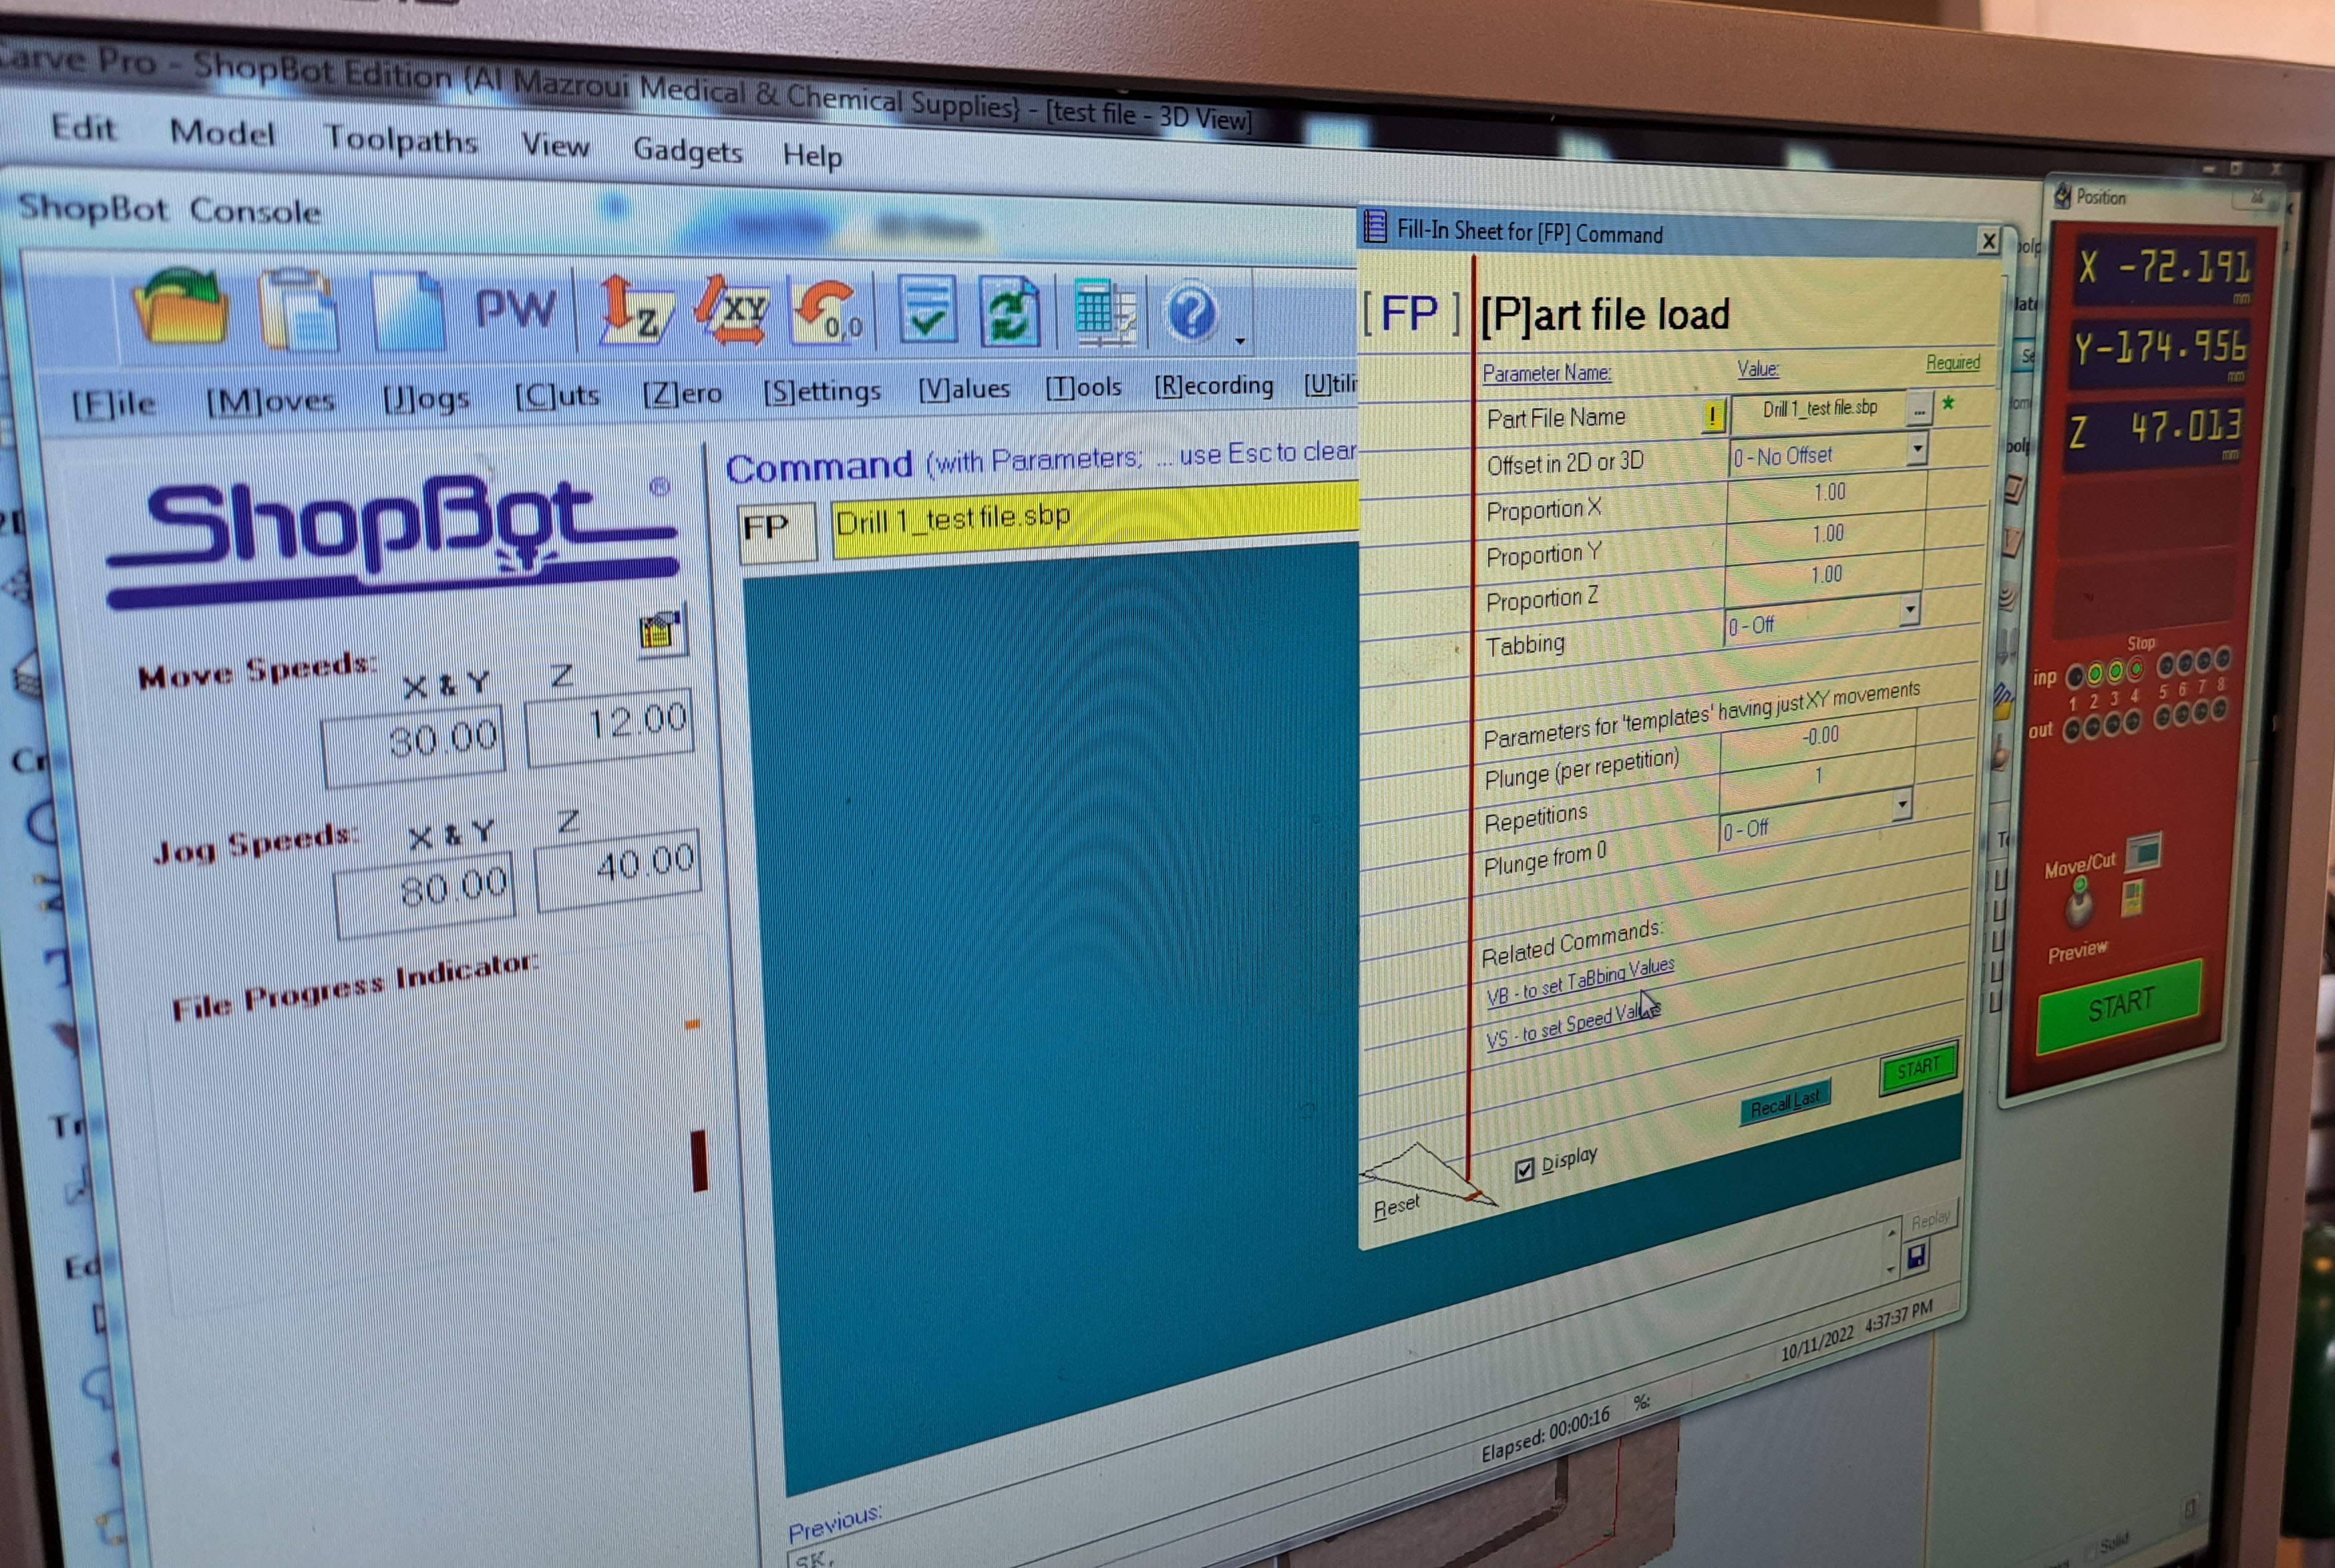
- Load the drilling toolpath.
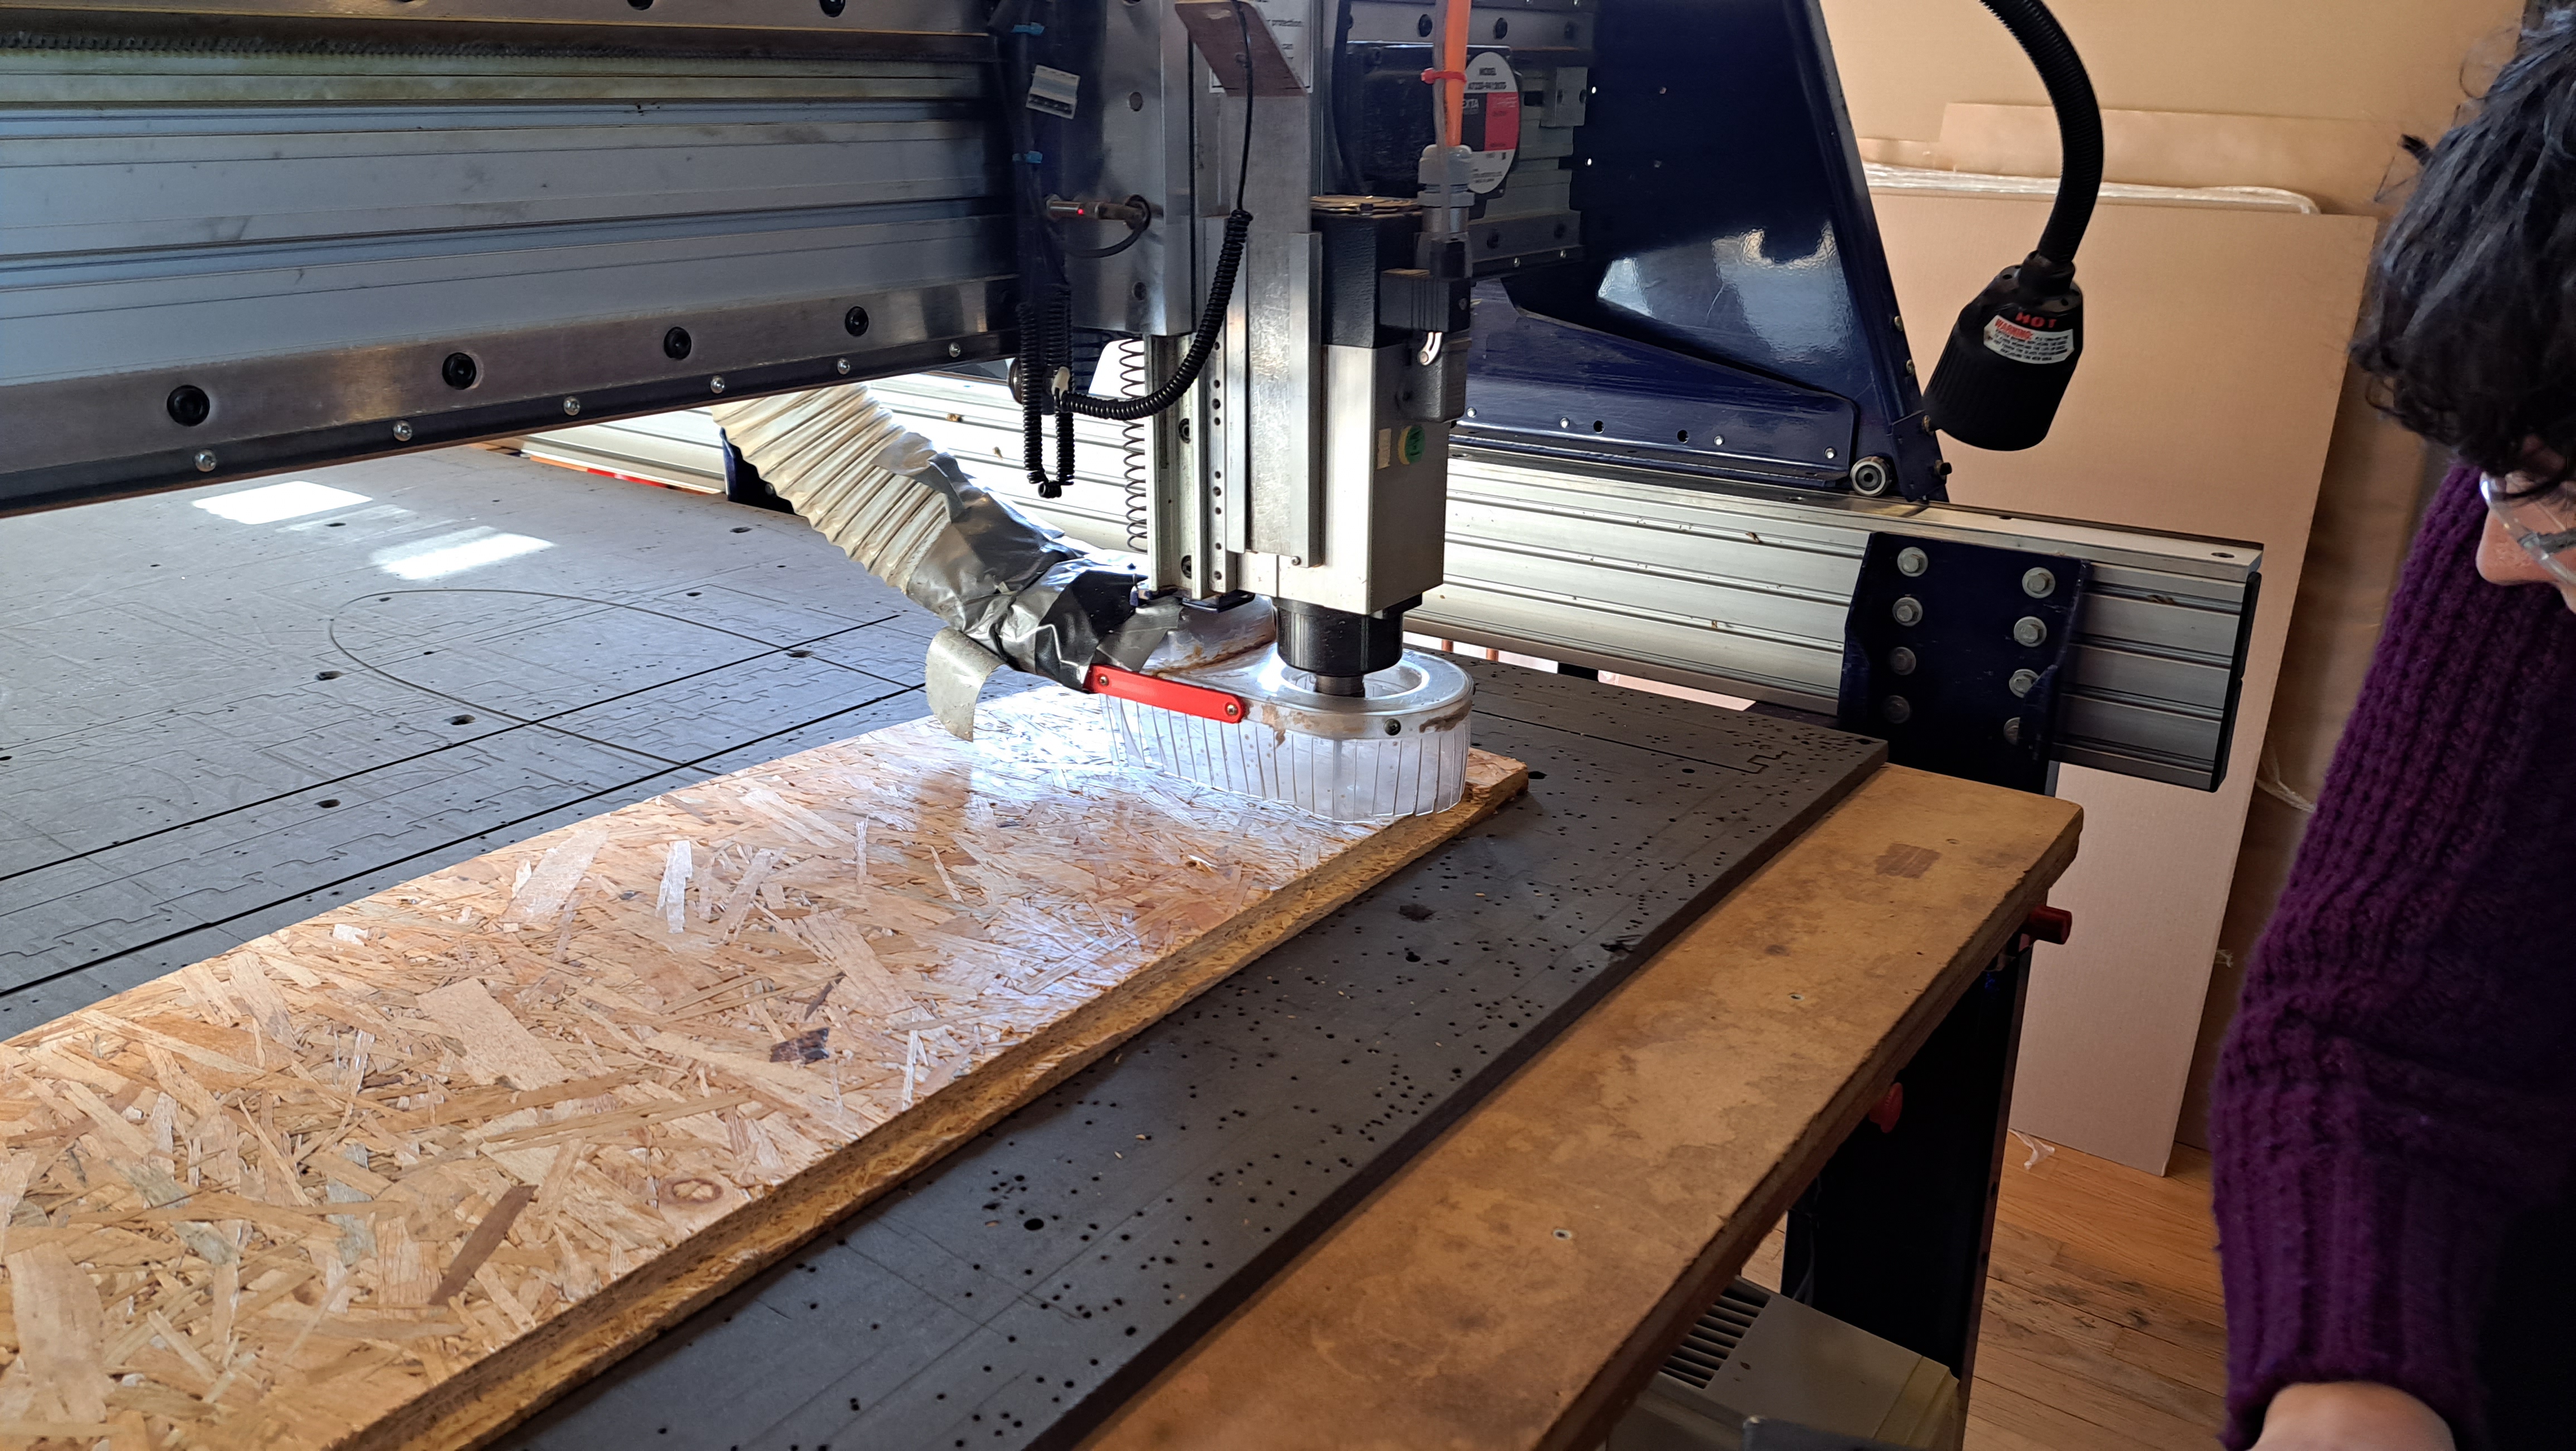
Start the milling job
- Put the key attached to the wrench in the keyhole underneath the machine on/off knob and turn it. The milling bit should start spinning.- Put the spindle speed to 18000 on the varispeed box manually.
- Turn on the ventilation and wait for a minute until it gains full power.
- Go back to Shopbot 3 screen and START job without changing anything.
- Hover your hand above SPACEBAR until you are sure the milling bit is moving according to expectations. Spacebar pauses the job if necessary.
- When drilling job is finished, screw the material on the sacrifical layer.
- Load the toolpath for the rest of the job and hit START again without changing anything.
- When the job is finished, move the milling head away with keypad controls.
Post-processing
- Turn off the ventilation and the CNC machine.- Unscrew the material from the sacrificial layer and move it away from the bed.
- Clean around the machine, use the vacuum cleaner where necessary.
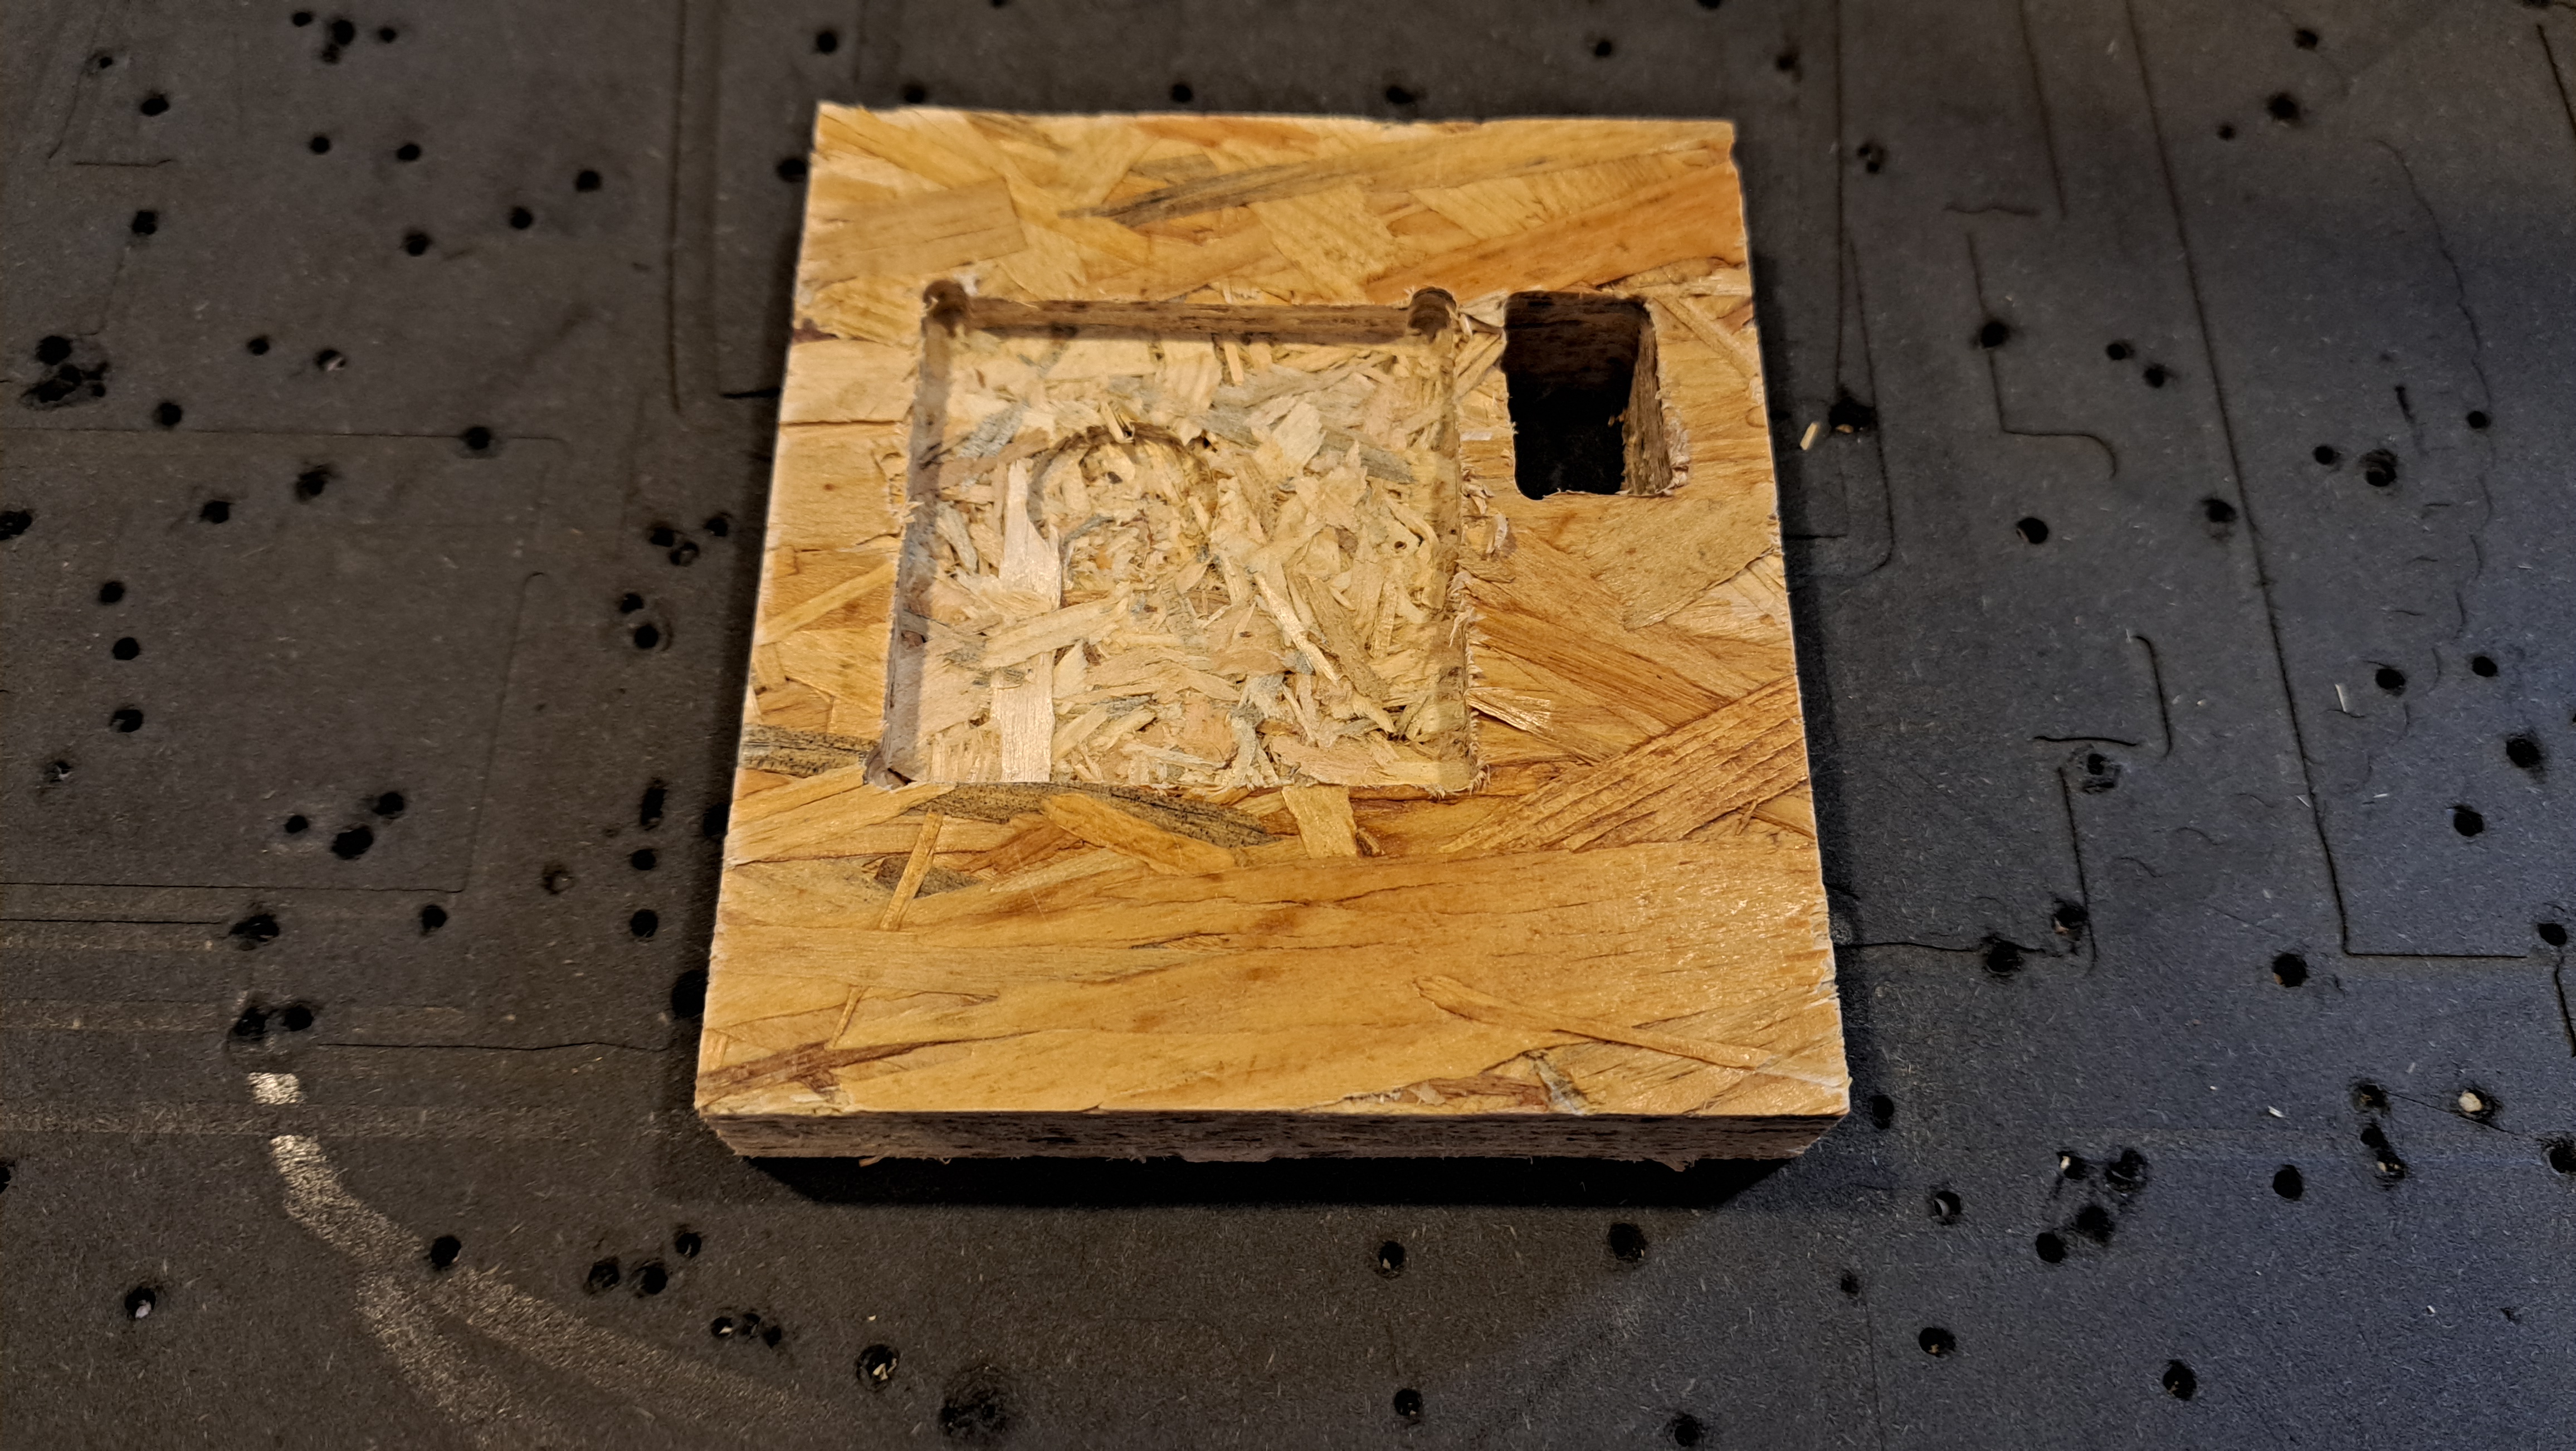
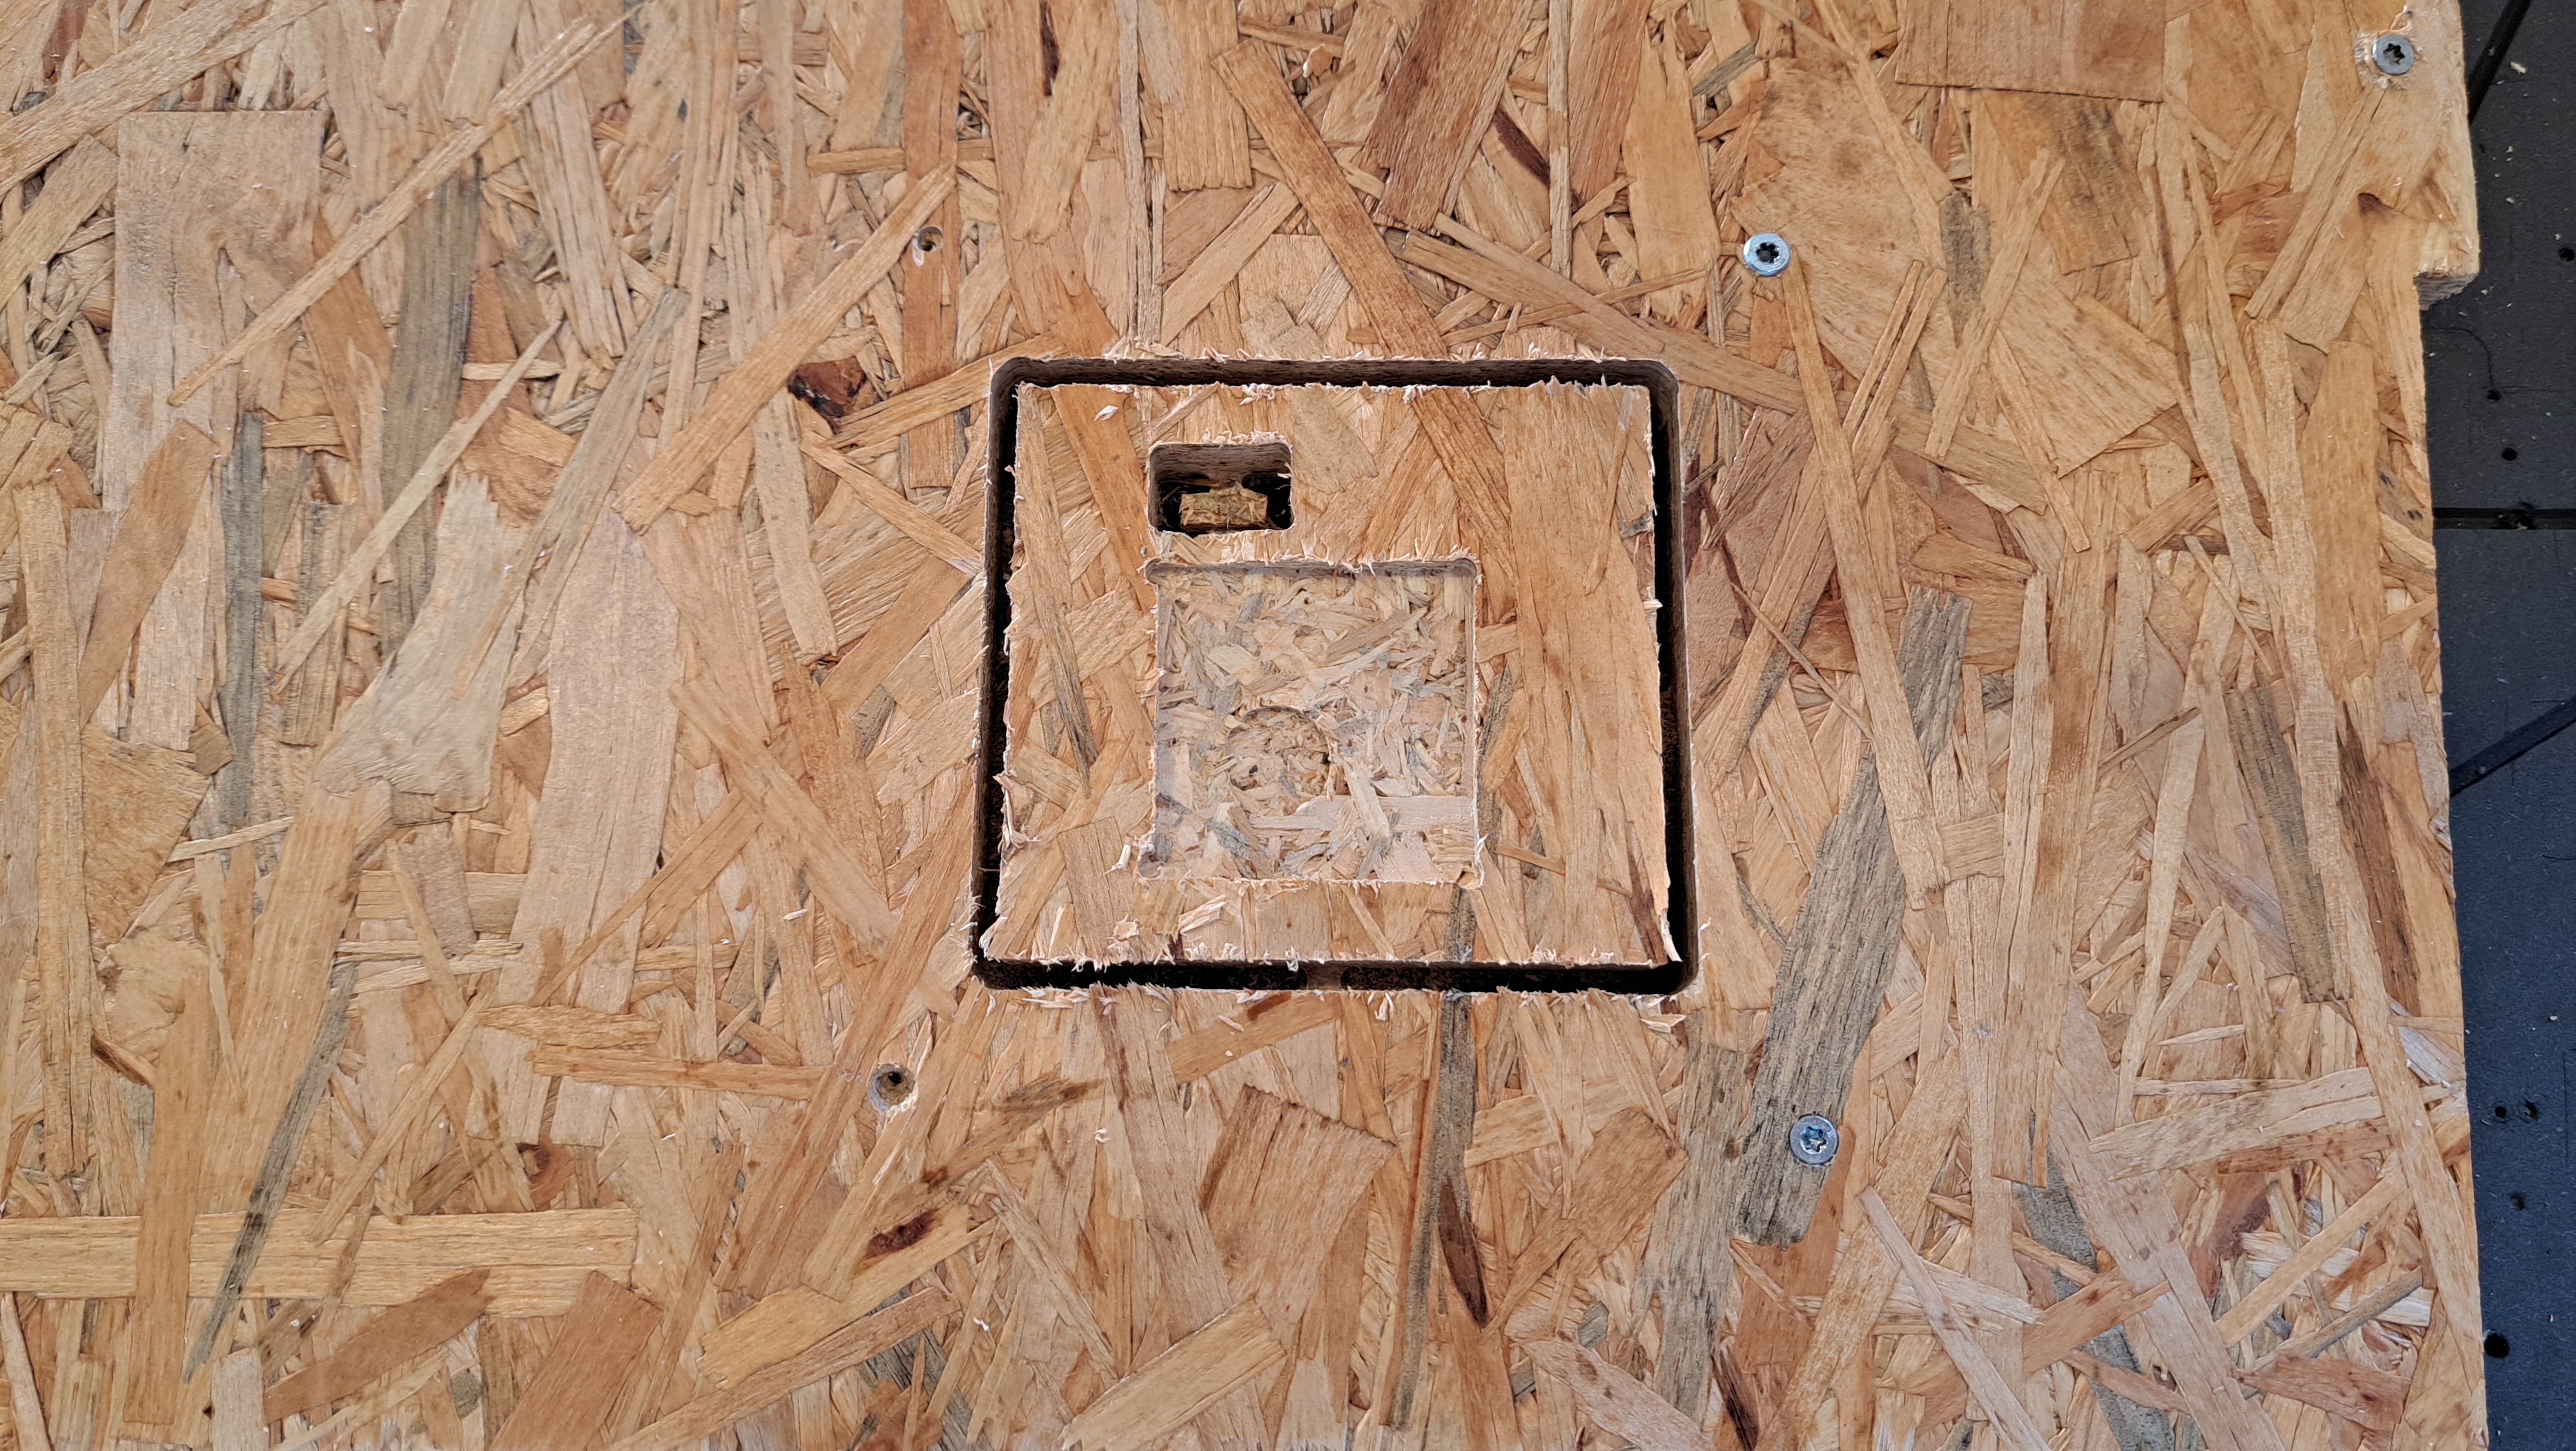
- Break the tabs around the cut shapes to remove them from the sheet material.
- Sand the irregularities around the milled parts.